# User Guide
# Catfish Tools Tutorial
A Revit productivity toolkit integrating automated workflows, standardized component libraries, and intelligent drawing generation — reducing repetitive work, improving collaboration efficiency, and ensuring drawing quality aligns with design intent.
Get started with Catfish Tools →
# Catfish Family Library Tutorial
A cloud-based family library management tool supporting soft furnishing, hard furnishing, detail, and custom categories. Drag-and-drop into projects with preserved render textures for consistent design results. The visual interface replaces the traditional project browser, streamlining design workflows.
Get started with Catfish Family Library →
# Catfish Framing Tutorial
One-click generation of various decorative process nodes, precisely matching finish and framing requirements, adapting to design changes while ensuring standardization and design intent consistency. Supports collision detection to optimize construction workflows.
Get started with Catfish Framing →
# Catfish Cloud Tutorial
Catfish Cloud is a cloud-based central file collaboration platform designed specifically for BIM / engineering modeling and team project collaboration.
Get started with Catfish Cloud →
# Installation, Activation & Troubleshooting
- Special Benefits Sponsors can contact the developer via WeChat (liuyanhu001) for priority feature development.
Watch tutorial videos on Bilibili → Catfish Tutorials (opens new window)
# Plugin Not Working / Commands Unavailable — Troubleshooting Guide
When Revit plugin commands fail or don't work properly, please follow these steps for systematic troubleshooting.
# 🔍 Troubleshooting Steps
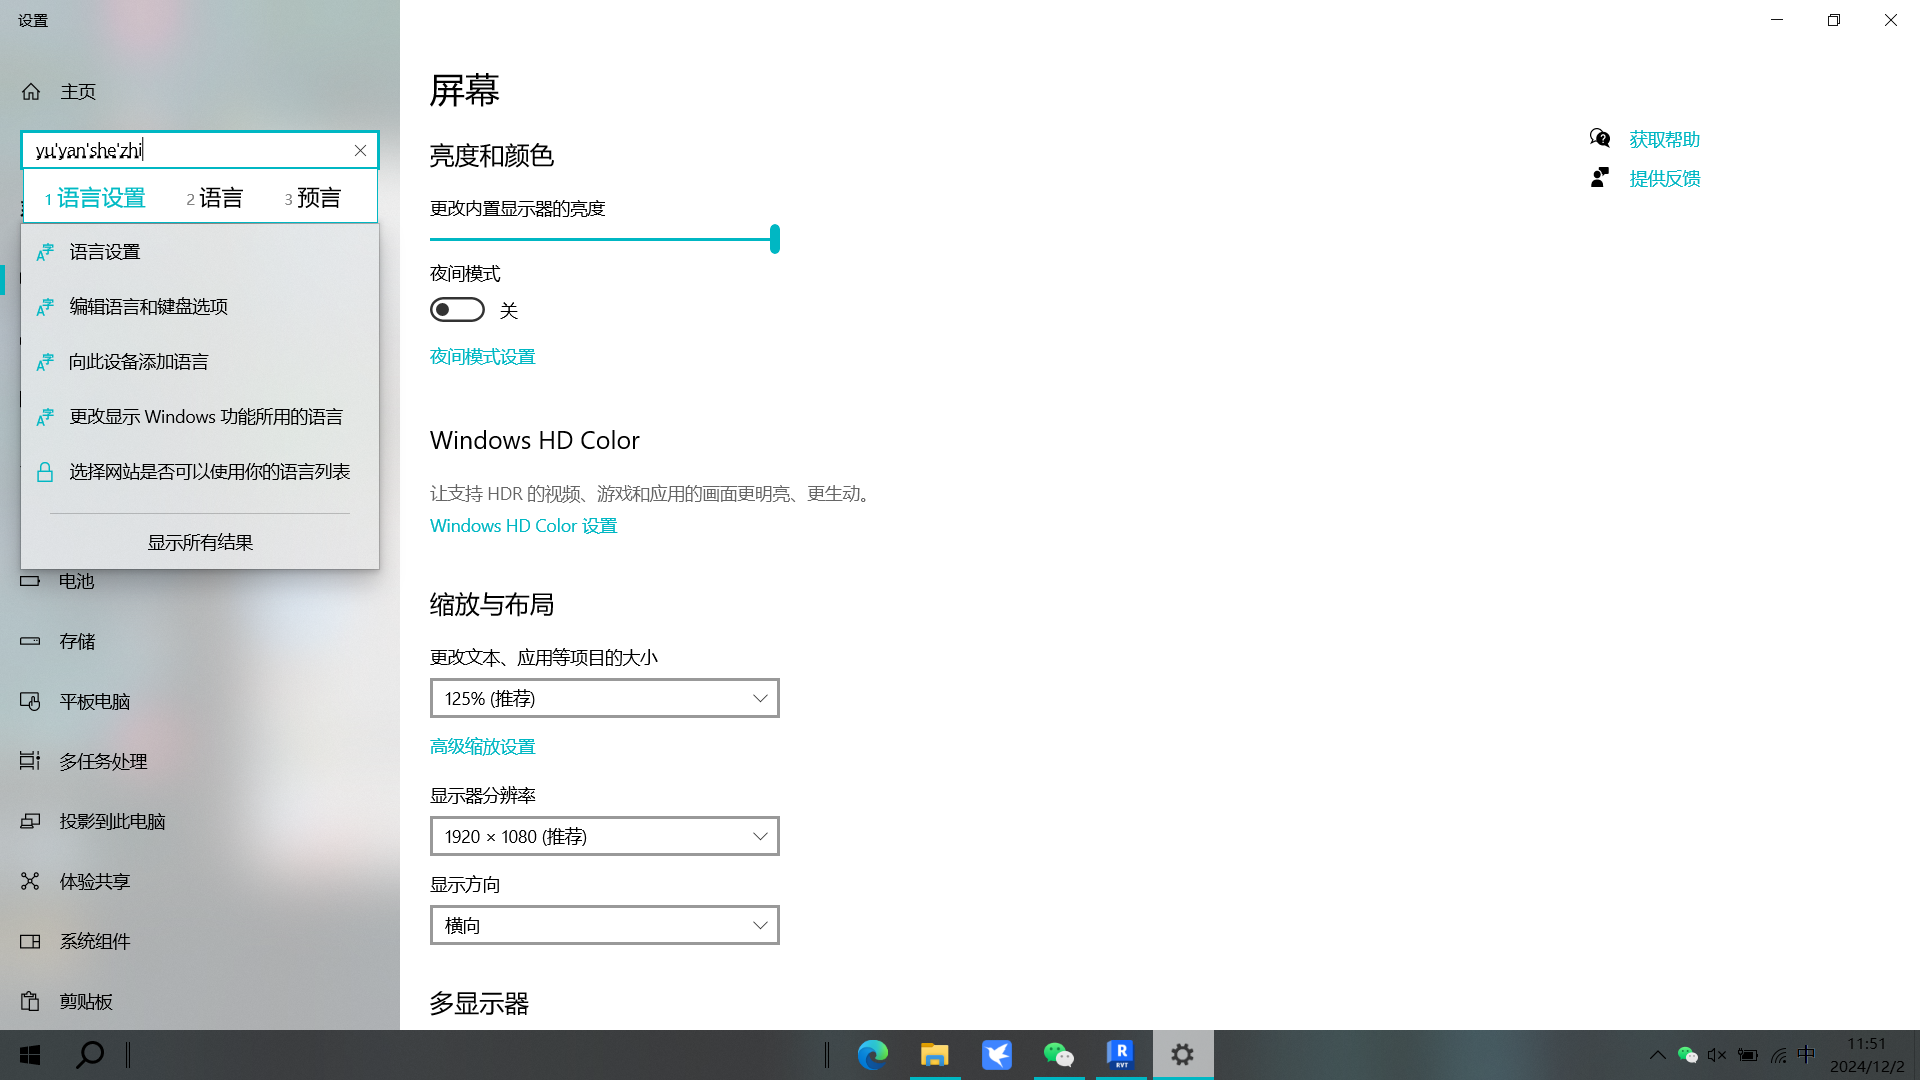
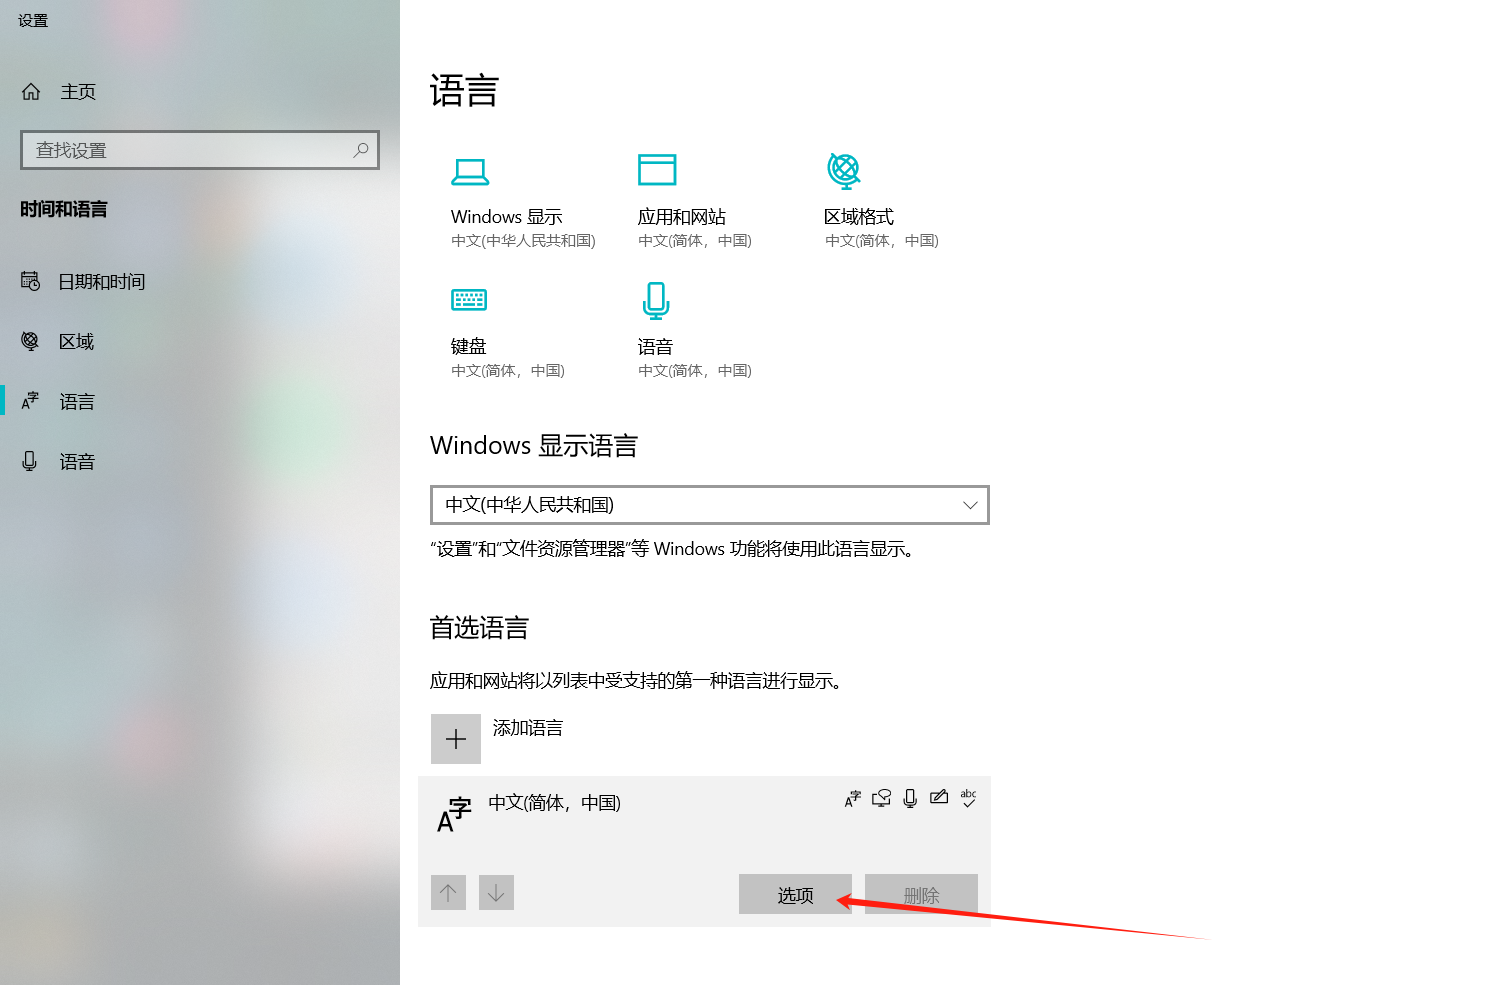
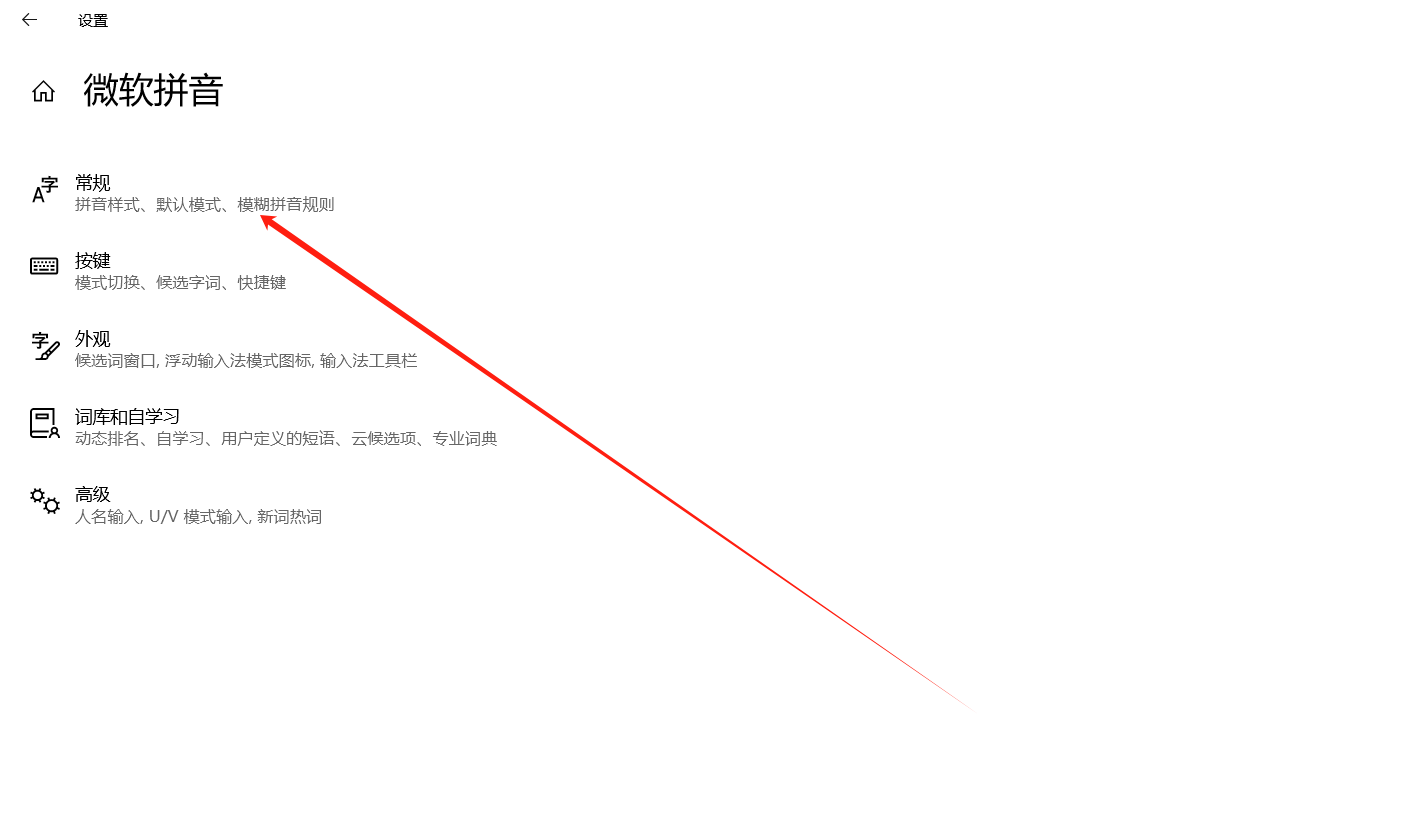
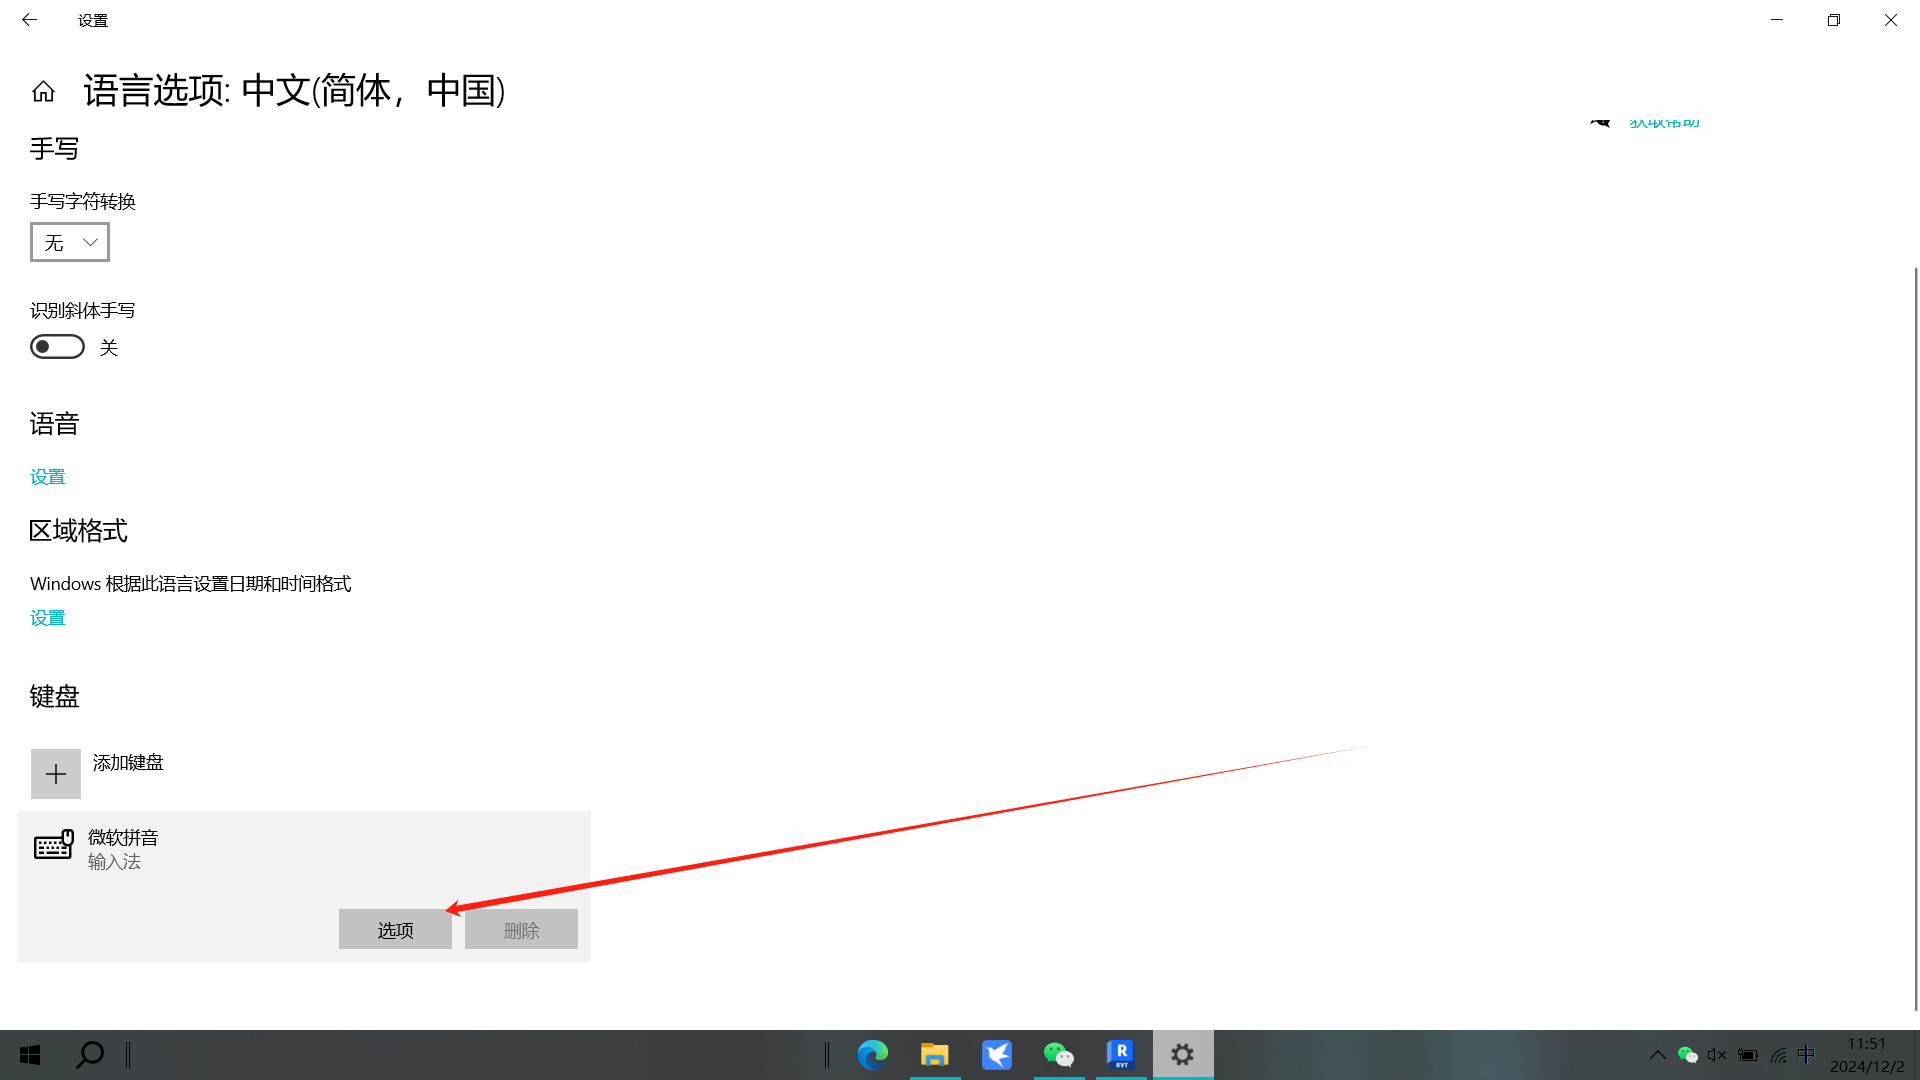
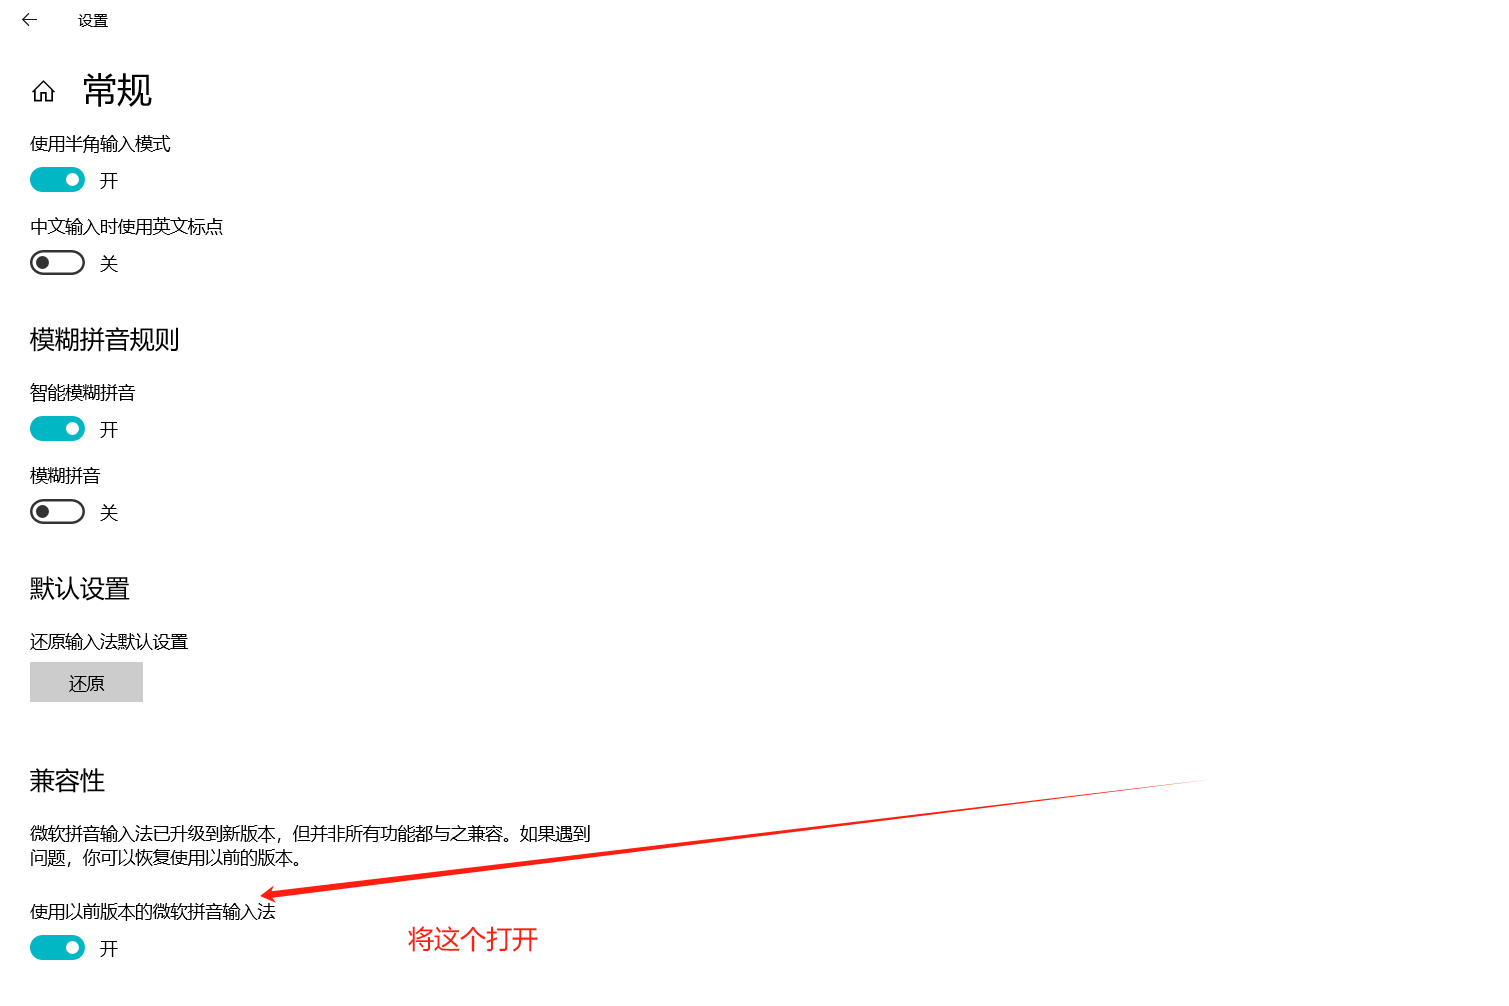
# 1. Input Method Compatibility
Problem: When opening plugins, especially those that require loading families by default, Revit may freeze or become unresponsive when encountering family version upgrades.
Solution:
- Configure as follows:
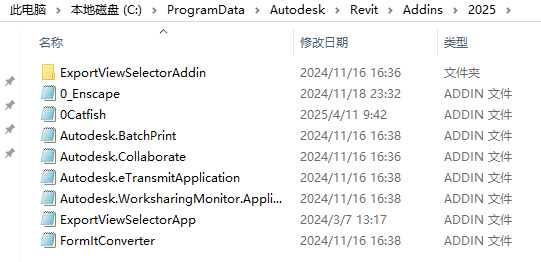
# 2. Plugin Conflict (Most Common Cause)
Problem: Installing too many plugins, especially those with similar functionality or from different developers, may cause resource contention, command overriding, or direct conflicts.
Solution:
- Navigate to C:\ProgramData\Autodesk\Revit\Addins folder and clean up the corresponding plugin addin files, temporarily disabling non-essential third-party plugins one by one.
- Test the failing command after disabling each plugin.
- If a conflict source is found, contact the plugin developer for a solution or choose to disable it permanently.
# 3. Template File Issues
Problem: The project template file currently in use may be corrupted, have incorrect settings, or contain non-standard content that affects plugin operation.
Solution:
- Use Revit's default architectural template
- Test the same plugin commands in the new template
- If commands work normally, the original template file has issues — consider cleaning or rebuilding the template
# 4. Software Installation Issues
Problem: Revit software installation is incomplete, or core files are damaged or missing.
Solution:
- Repair Installation: Go to Control Panel → "Programs and Features" → Find Revit → Select "Repair"
- Reinstall: If repair doesn't work, completely uninstall the current Revit and reinstall from a complete, reliable installation package
# 5. Plugin Bugs
Problem: The plugin itself has programming errors.
Solution:
- Confirm you are using the latest version of the plugin
- Provide detailed feedback to the plugin developer (including operation steps, Revit version, error screenshots, etc.)
# 📋 Recommended Troubleshooting Flow
Follow this order for maximum efficiency:
- First Test → Check if family upgrade causes freezing
- First Test → Test plugin commands in default template
- Core Troubleshooting → Use elimination method, disable other plugins, check plugin conflicts
- Check Updates → Ensure plugin is up to date and contact developer for feedback
- Last Resort → Repair or reinstall Revit software
# 💡 Notes
- Make only one change at a time to accurately identify the problem
- Record the troubleshooting process to provide detailed information to developers
- Regularly clean up unused plugins to reduce conflict probability
If none of the above methods resolve the issue, please contact the plugin's official technical support.
# Install / Uninstall
Please close all running Revit instances before installing or uninstalling.
# Installation
Before installing the plugin, please confirm that a supported version of Revit (2018-2026) is installed.
Click to download the latest installer
# Overwrite Installation
Users who have already installed an older version can use the new installer to perform an overwrite installation without uninstalling the old version.
The installation will be placed in the same directory as the previous version.
# Plugin Not Loading
If the plugin is not loading, first check if the 0_Catfish.addin file exists in the following path:
C:\ProgramData\Autodesk\Revit\Addins\2027
If the file exists but the plugin still doesn't load, copy it to the following path:
C:\Users\Administrator\AppData\Roaming\Autodesk\Revit\Addins\2027
Note: Replace the username in the path with your actual computer username.
# Uninstall
Open "Programs and Features" in the Control Panel, find the plugin to uninstall, right-click and select Uninstall.
Navigate to C:\ProgramData\Autodesk\Revit\Addins folder and clean up the 0_Catfish files in each version's addin folder.

Note: You need to clean up all 0catfish files in all versions (the name may change in the future, the main identifier is "catfish").
# Registration & Activation
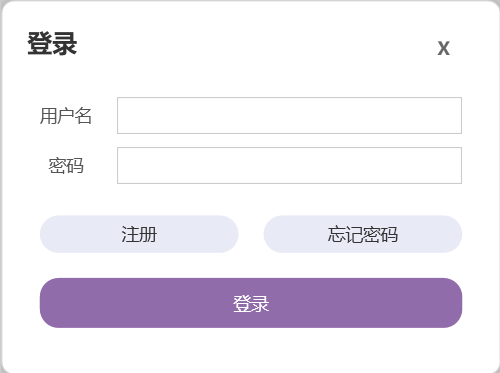
After installing the plugin, a login interface will pop up when you first open the software. You can register your own username and password. This login is only for plugin functionality — if you don't need to use the plugin, you can simply close the login interface. When you need to use the plugin, reopen the software and log in.
Stay logged in for 24 hours without re-entering credentials.
The unauthorized icon appears gray; after authorization, it returns to full color for normal use.
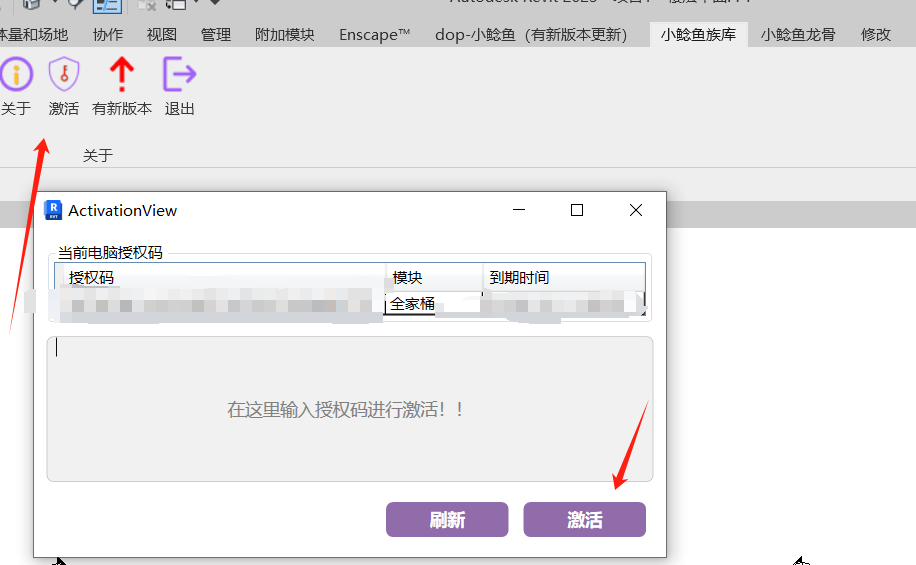
Enter the authorization code in the family library panel to activate.
The authorization code shown in the popup is the code bound to the current computer (for display only). You need to enter the authorization code in the field below to activate.
How to obtain an authorization code:
Add WeChat (liuyanhu001) to purchase.
Lifetime license users support computer rebinding.
Tools →