# DIY Curtain Wall
# Curtain Wall Workshop

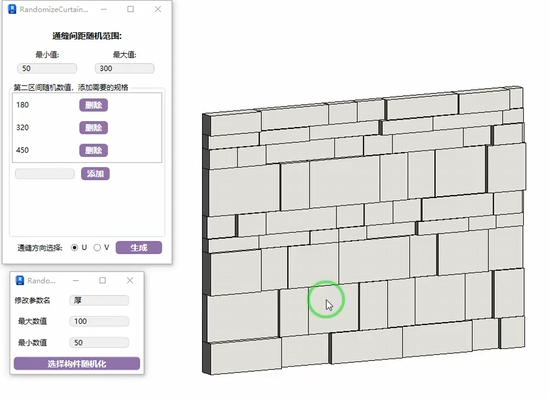
Randomize curtain wall grid creation, especially useful for feature wall design. Avoid setting specifications too small during creation to prevent long wait times.
- Parameter Details
The curtain wall type used must have no default grid divisions.

Min/max values randomize the spacing in the aligned direction.
The second section randomly adds specifications based on width. For example, with bricks of 800, 600, and 300, they are randomly cut horizontally based on the min/max values, then randomly arranged.
Aligned direction selection: U is horizontal, V is vertical, based on curtain wall grid generation direction.
Below is an example of the generated effect:
Watch tutorial video on Bilibili → Random Grid (opens new window)
# Cabinet Doors
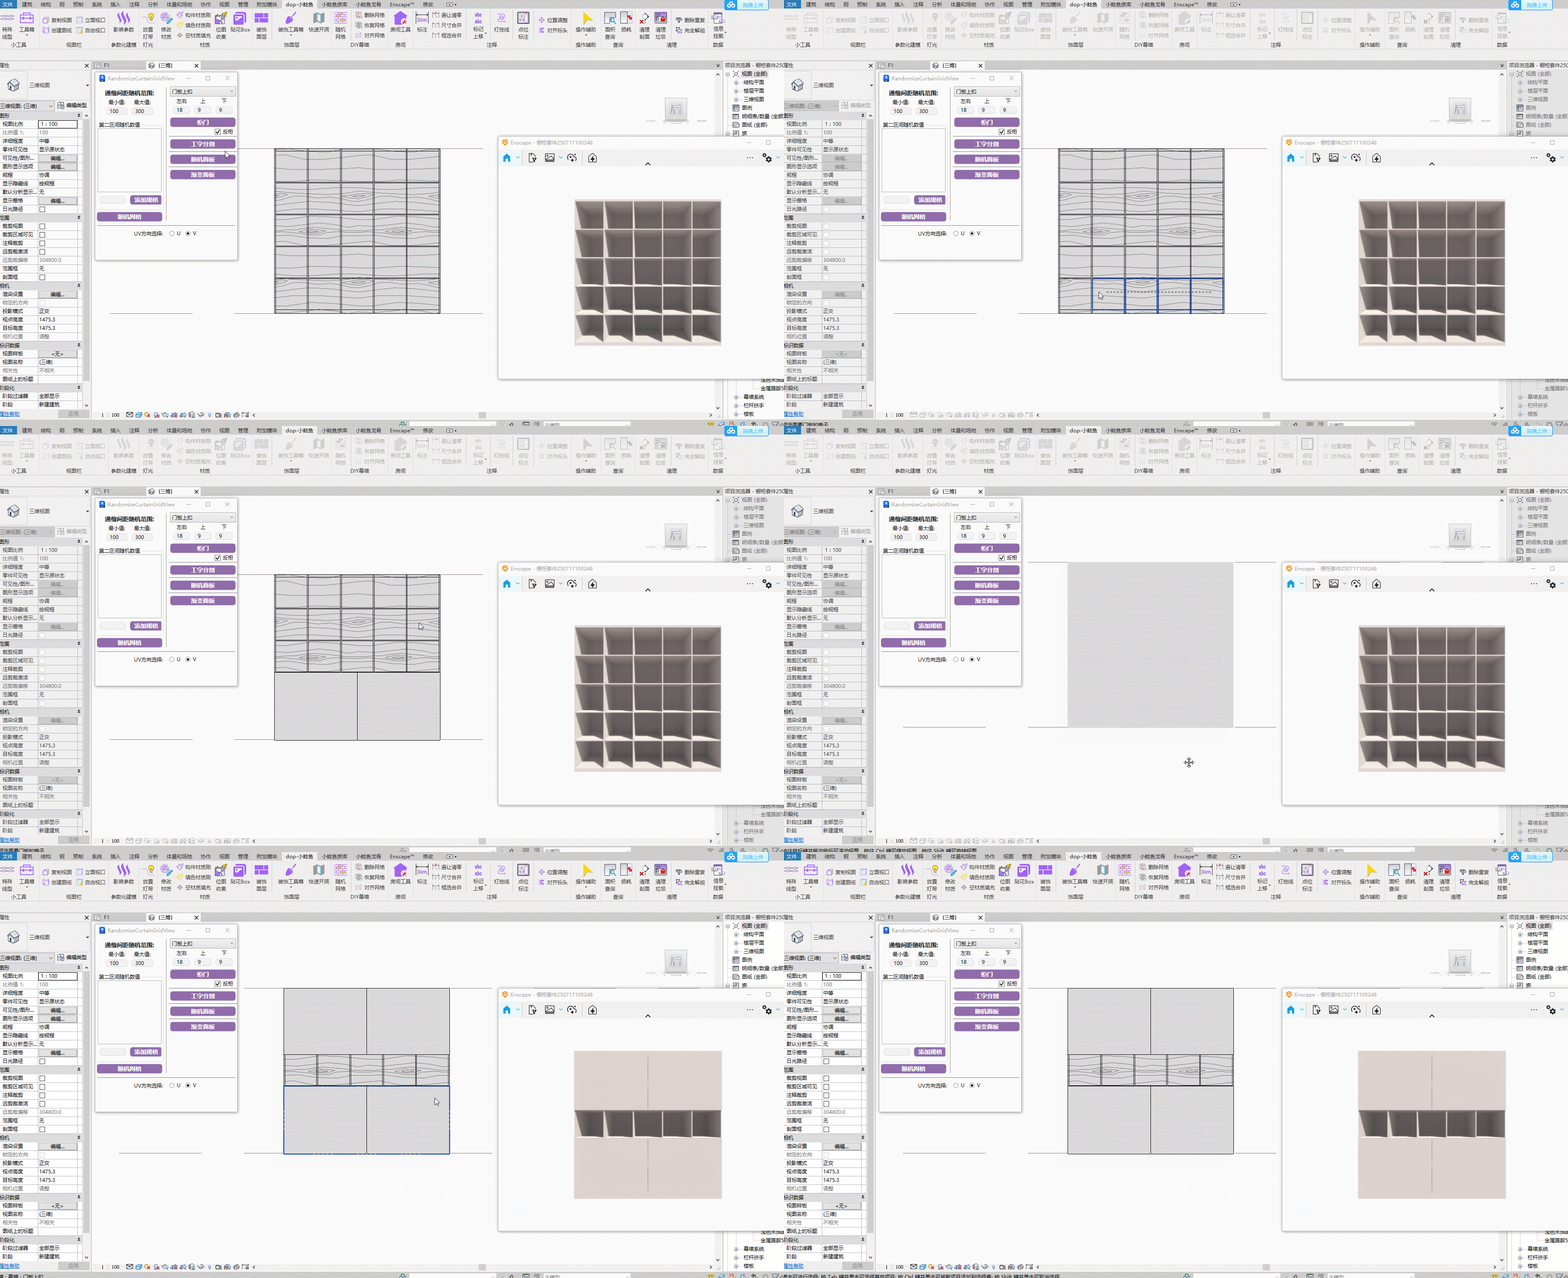
Check the front/back of your curtain wall cabinet in the interface. Generated door panels will be placed on the corresponding curtain wall face. The door panels are also curtain wall types, selectable in the options. Margins can be customized.
# H-Pattern Division

H-pattern (running bond) division for curtain wall series.
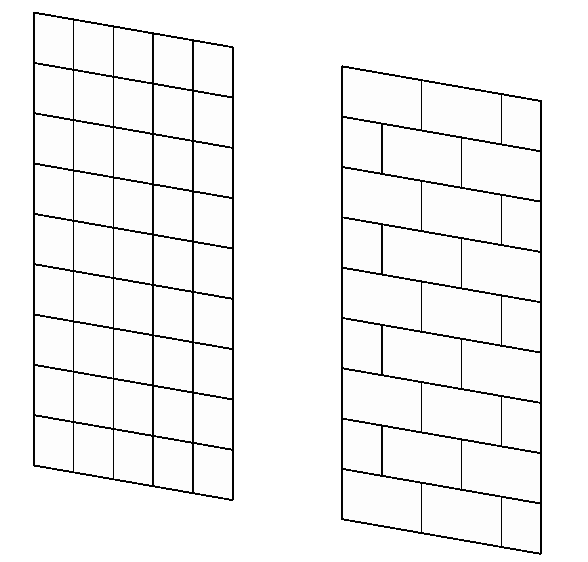
Compatible with curtain walls and glass sloped glazing types. The H-pattern division direction can be toggled by clicking again.
When handling H-pattern dimensions, grid lines are deleted at intervals. For example, for 300 × 600 brick H-pattern laying, the grid setting needs to be 300 × 300.
Watch tutorial video on Bilibili → H-Pattern Division (opens new window)
# Random Panels

- Random Panels
Randomize panel types within a curtain wall.
- Steps
Create a curtain wall with one type first, then replace all panel types you want to appear randomly on the current curtain wall. Click the function, then click the curtain wall to generate randomized panels. Can be clicked multiple times for different effects.
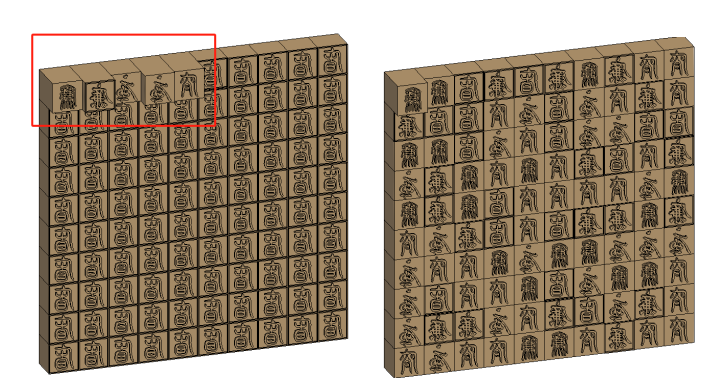
Watch tutorial video on Bilibili → Random Panels (opens new window)
# Gradient Panels
Ensure the curtain wall contains only two panel styles as gradient elements. Clicking repeatedly toggles the two elements. UV selection switches the gradient direction.
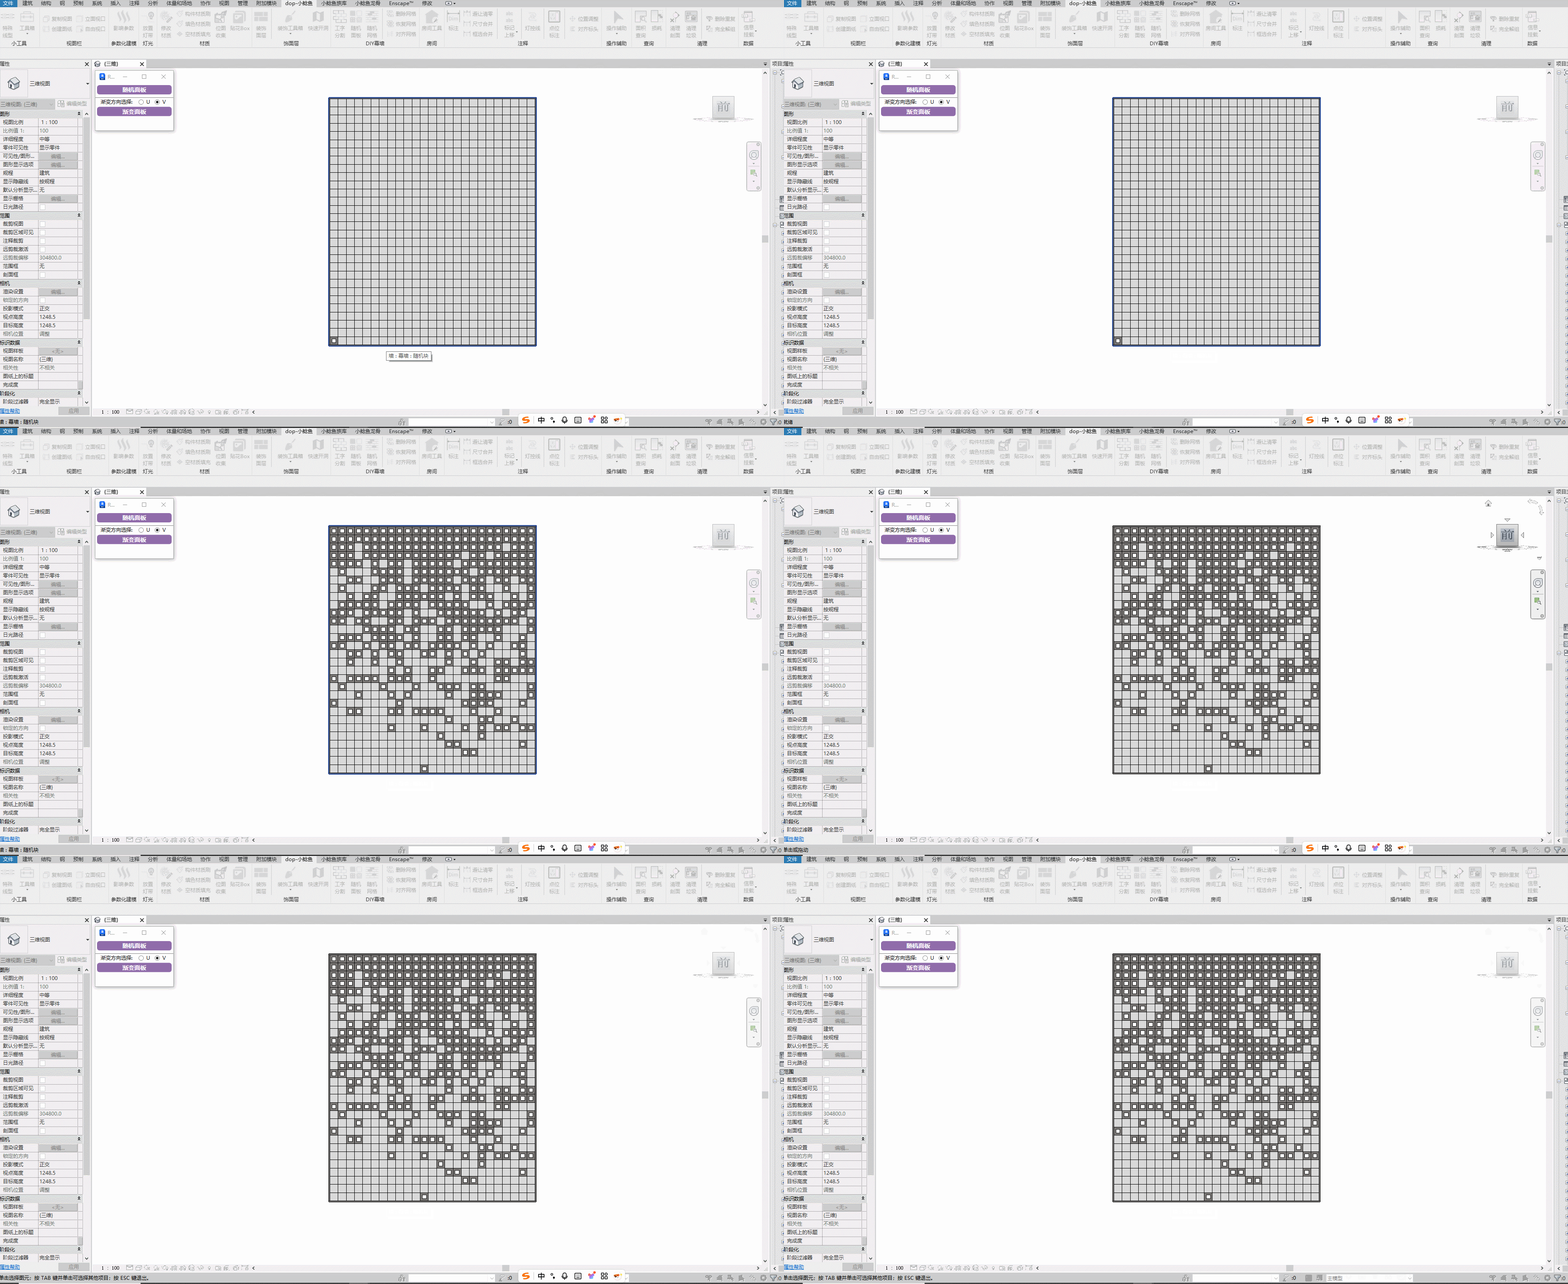
Steps: Select curtain wall types multiple times to toggle element direction.
# Glass Sloped Glazing Alignment
Align grids to a specified edge when the floor paving created by glass sloped glazing is not horizontal.
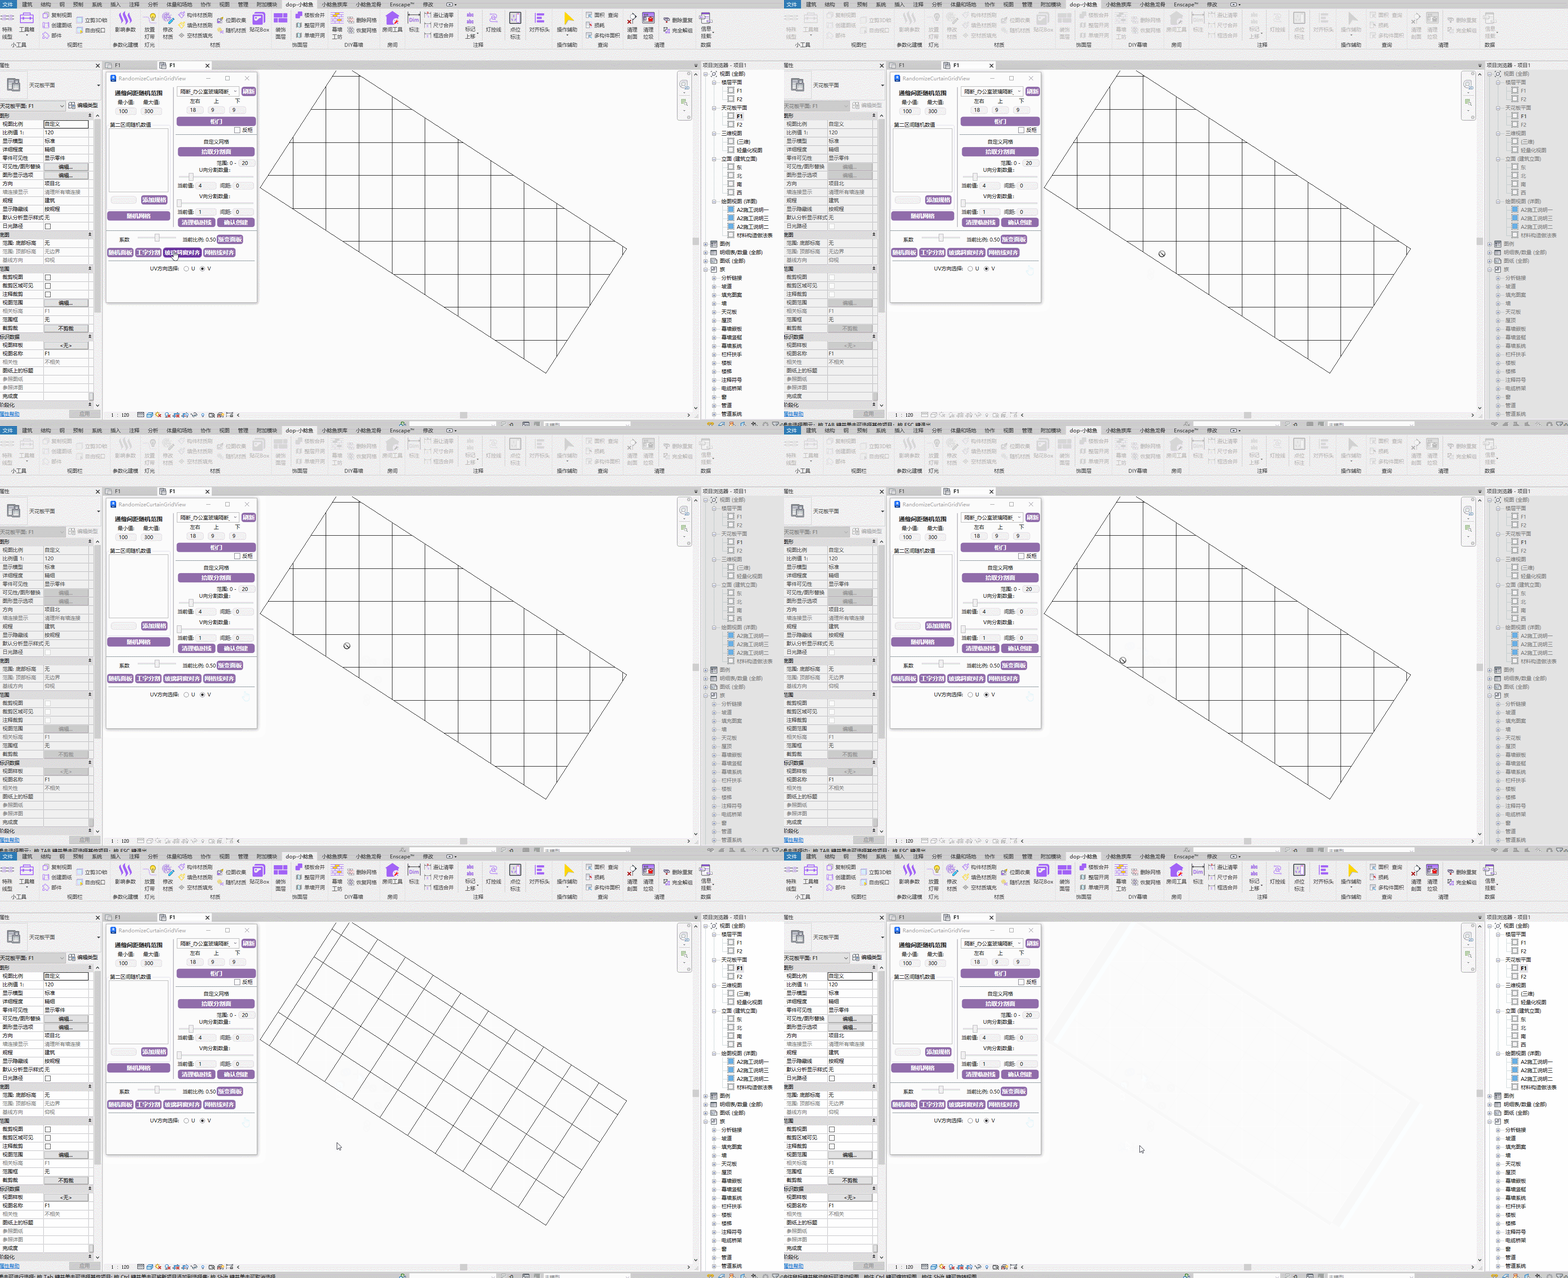
Steps: Select the grid line to align → Select the sloped edge of a panel on the current glass sloped glazing.
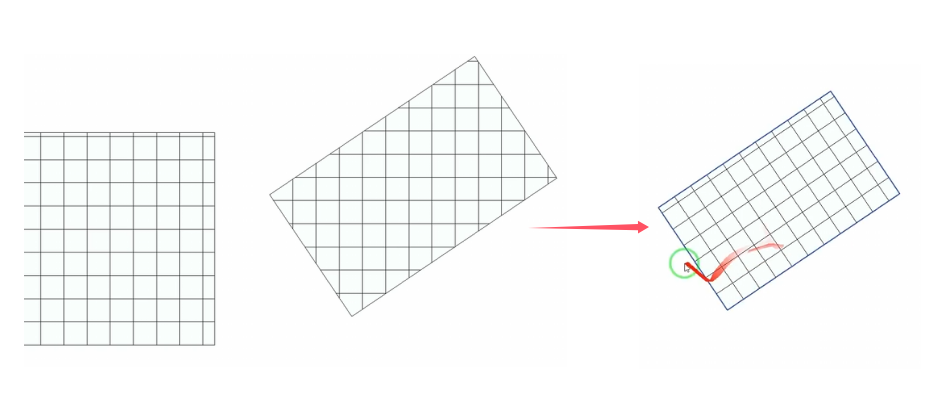
First select the grid line to align, then pick the model boundary to align to.
Watch tutorial video on Bilibili → Glass Sloped Glazing Alignment (opens new window)
# Grid Line Alignment
First select the reference line to align to, then select nearby parallel grid lines.

Watch tutorial video on Bilibili → Curtain Wall Alignment (opens new window)
# Panel Information
First add three project parameters with corresponding names to the project, for the panel category. Width and height are length types, and number is text type.
# Panel Numbering
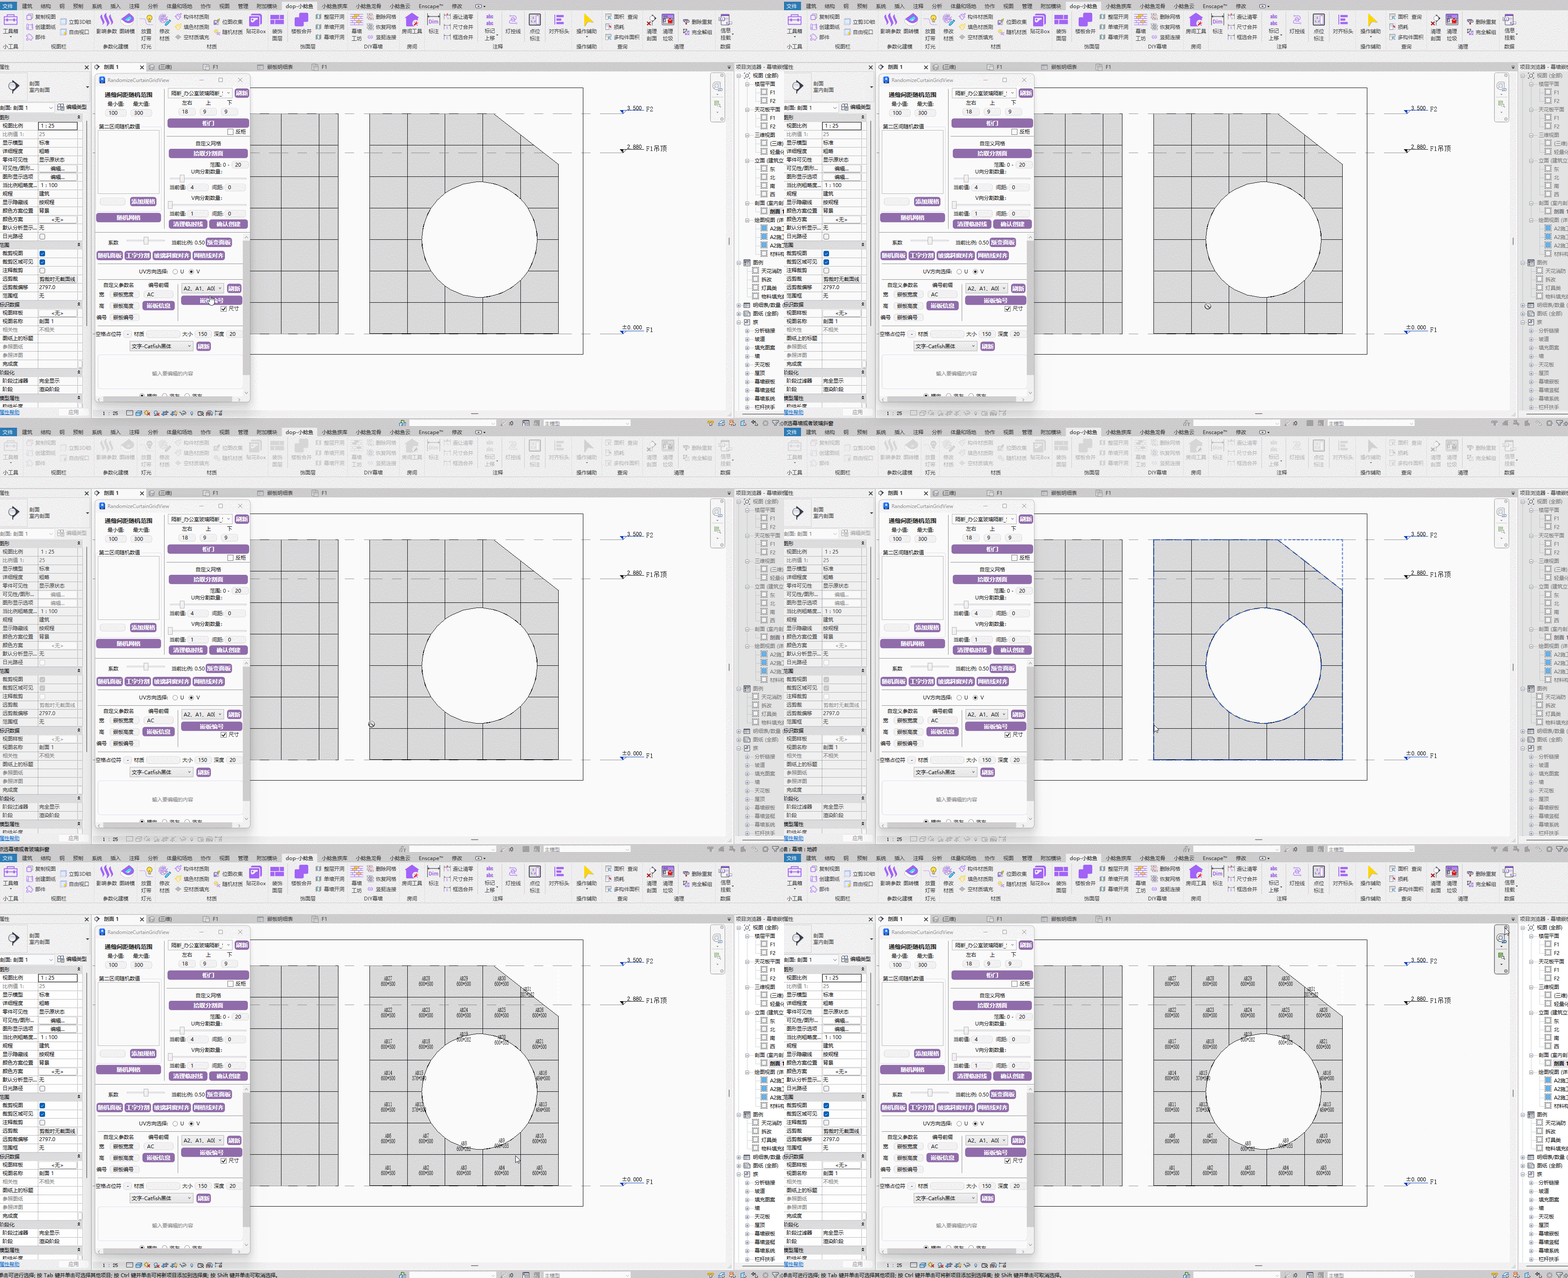
Watch tutorial video on Bilibili → Panel Information & Numbering (opens new window)
# Curtain Wall Text
Generate batch 3D text content based on curtain wall panels.
For text specifications, material, size, and depth are controlled from the software interface. Only when you need to change the font, copy a previously generated text panel and modify the font.
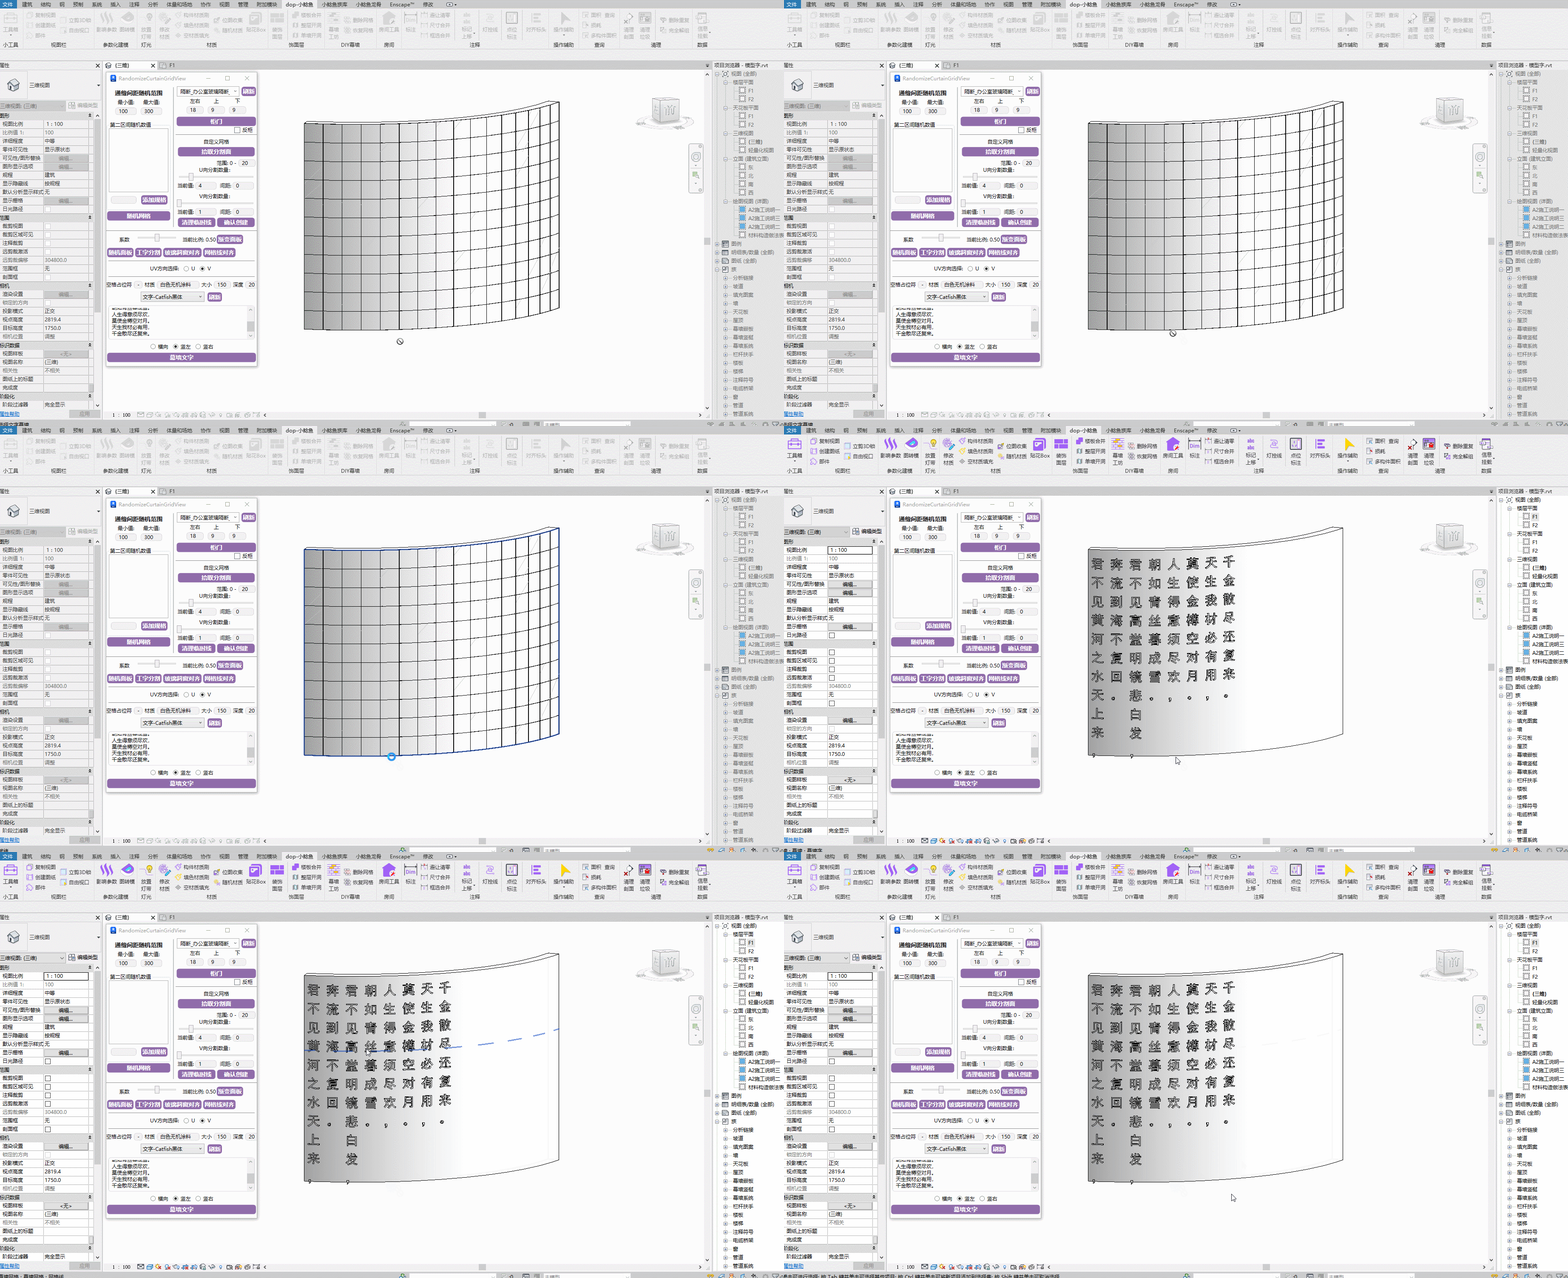
Watch tutorial video on Bilibili → Curtain Wall Text (opens new window)
# Custom Grid
Quickly divide grids for curtain wall components without UV constraint rules, avoiding overly rigid default rules.

Watch tutorial video on Bilibili → Custom Grid (opens new window)
# Delete Grid

Quickly delete unwanted grid lines by box-selecting.
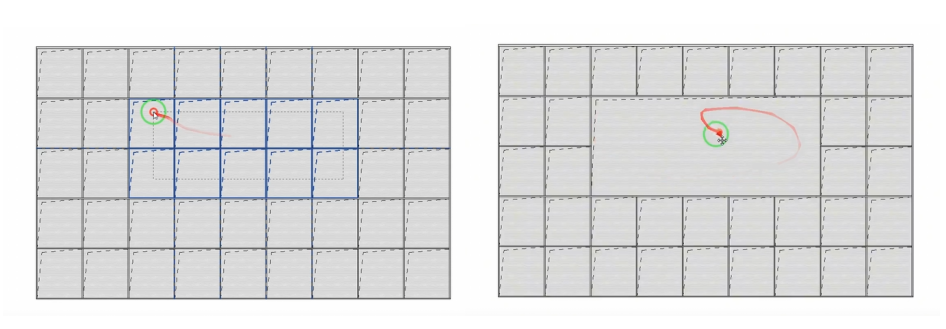
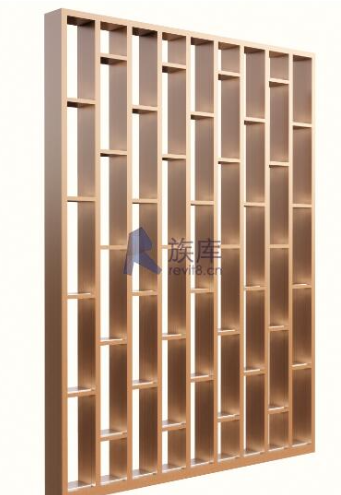
Use case: Create DIY cabinet dividers by quickly deleting grids.
# Restore Grid

Box-select grid lines to quickly restore grid divisions.
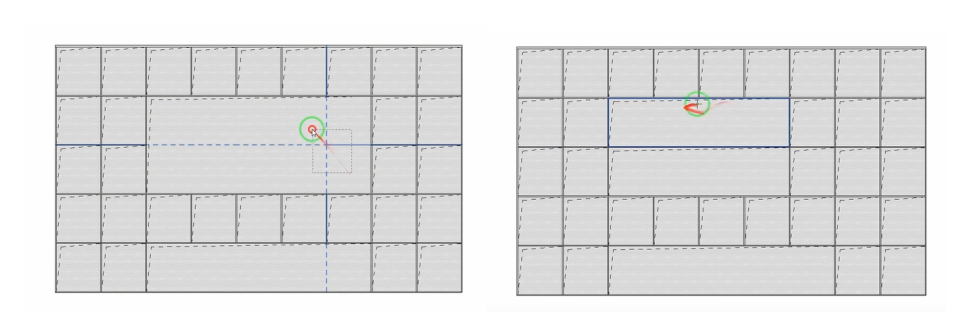
Click the panel where you want to restore grid lines, then box-select the grid lines to restore. Blue lines indicate grids that will be restored.
Watch tutorial video on Bilibili → Delete & Restore Grid (opens new window)
# Mullion Connection
Box-select mullions in the same direction to connect them.
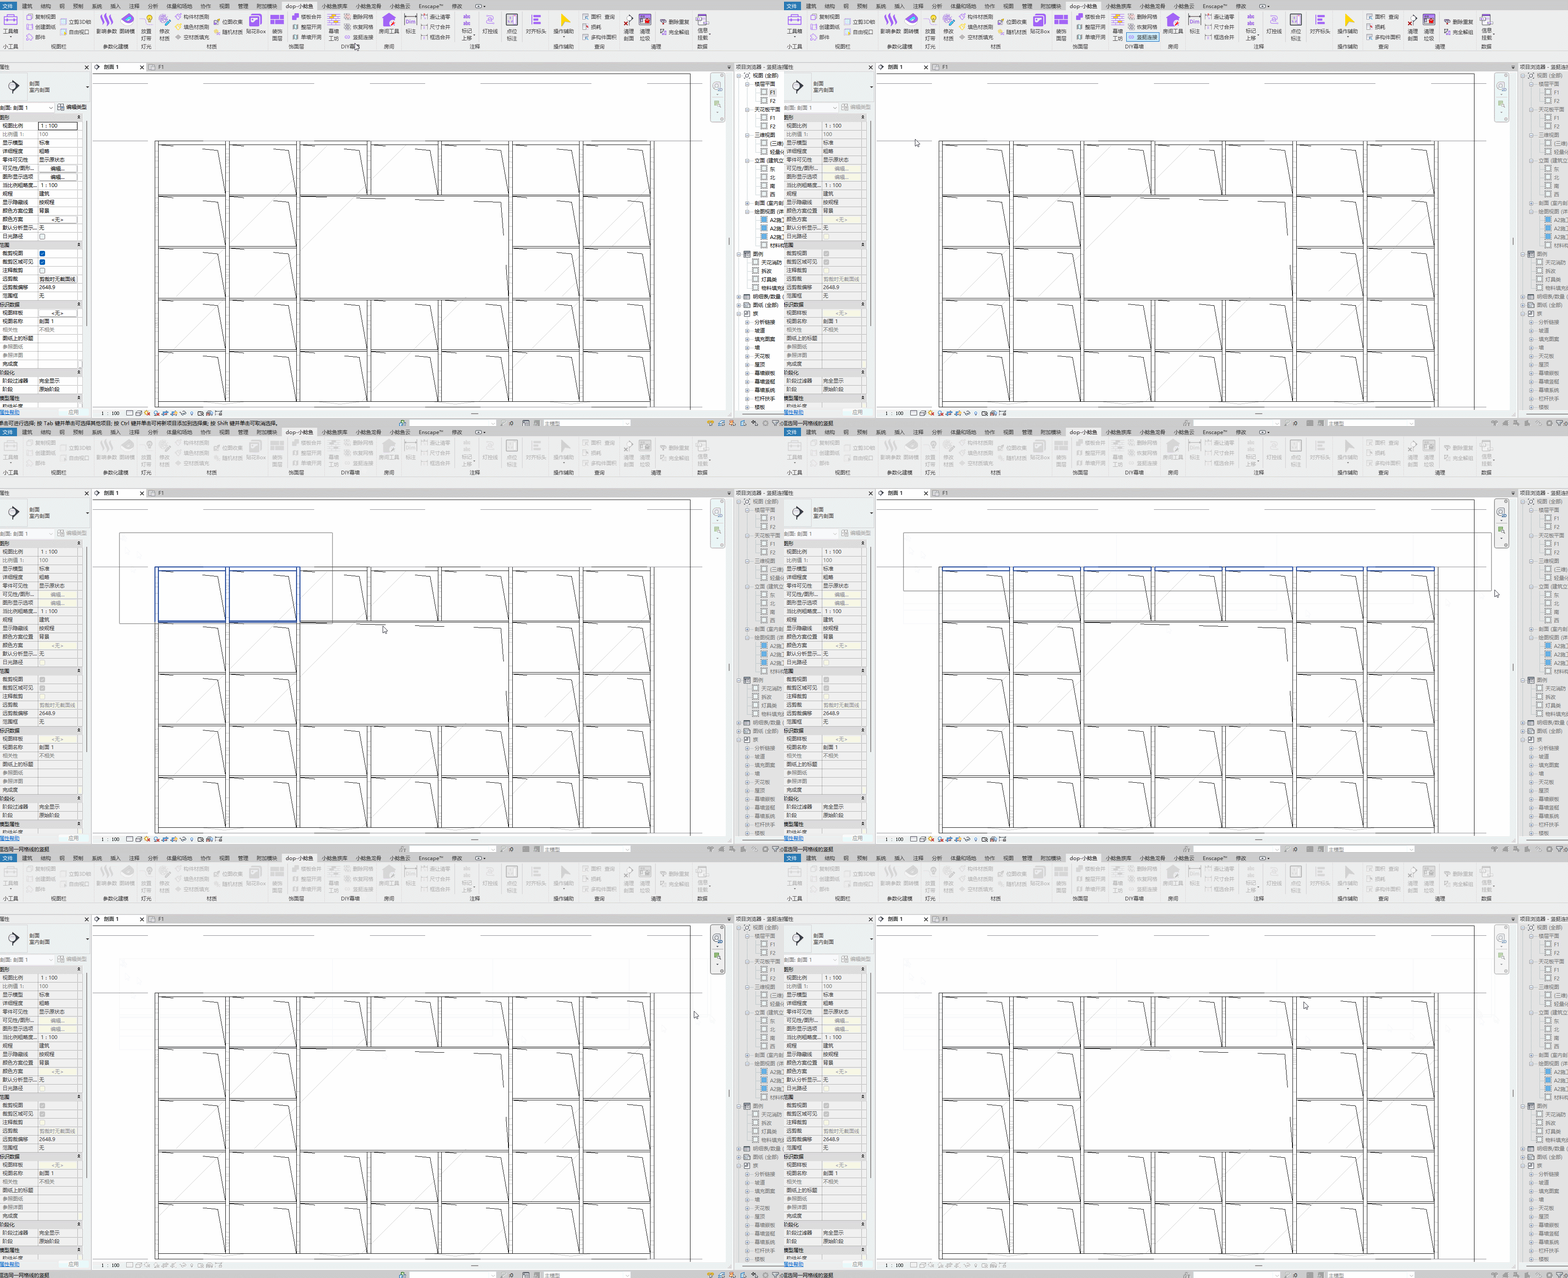
Watch tutorial video on Bilibili → Mullion Connection (opens new window)
← Finish Layers Rooms →