# Parametric Modeling
# Influence Parameters

Adjust parameters of components with the same instance parameters — overall increment, parameter randomization, parameter extension, select influence line, select image reference.
Don't limit yourself to the examples shown.
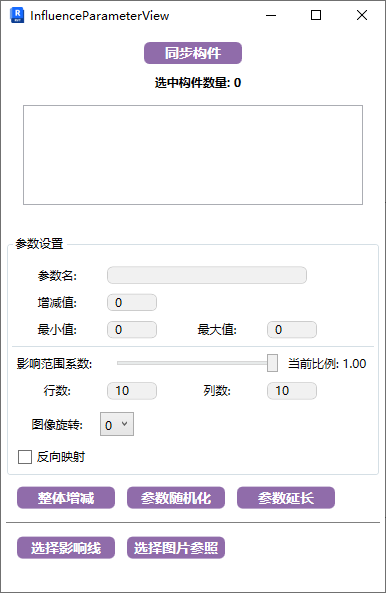
- Parameter Details
- Sync Components:
Sync all related components. After selecting once, you can adjust parameters multiple times. You can end the selection state after syncing.
- Parameter Name:
The parameter name must be a model instance parameter.
Ensure all affected models have the same instance parameter name.
- Increment/Decrement Value:
Adjust instance parameters based on the original value. The adjustment magnitude depends on positive/negative values. If reduced below the model's generation limit, the original value is maintained.
Applies to the "Overall Increment/Decrement" function below.
- Min/Max Values:
The random range for model parameter variation.
Applies to the "Parameter Randomization", "Select Influence Line", and "Select Image Reference" functions below.
- Influence Range Coefficient:
The range and intensity of parameter influence. Value range 0-1, where 1 is maximum influence (full-depth variation). Lower values reduce the influence range and deformation amplitude.
Applies to the "Select Influence Line" function below.
- Rows/Columns:
Divide the image into rows and columns to obtain pixel brightness values. Higher density means finer influence.
Applies to the "Select Image Reference" function below.
- Image Rotation:
Rotate the image by the desired angle.
Applies to the "Select Image Reference" function below.
- Reverse Mapping:
Reverse-map family parameters based on min/max values.
Applies to the "Select Influence Line" and "Select Image Reference" functions below.
- Steps
# Overall Increment/Decrement
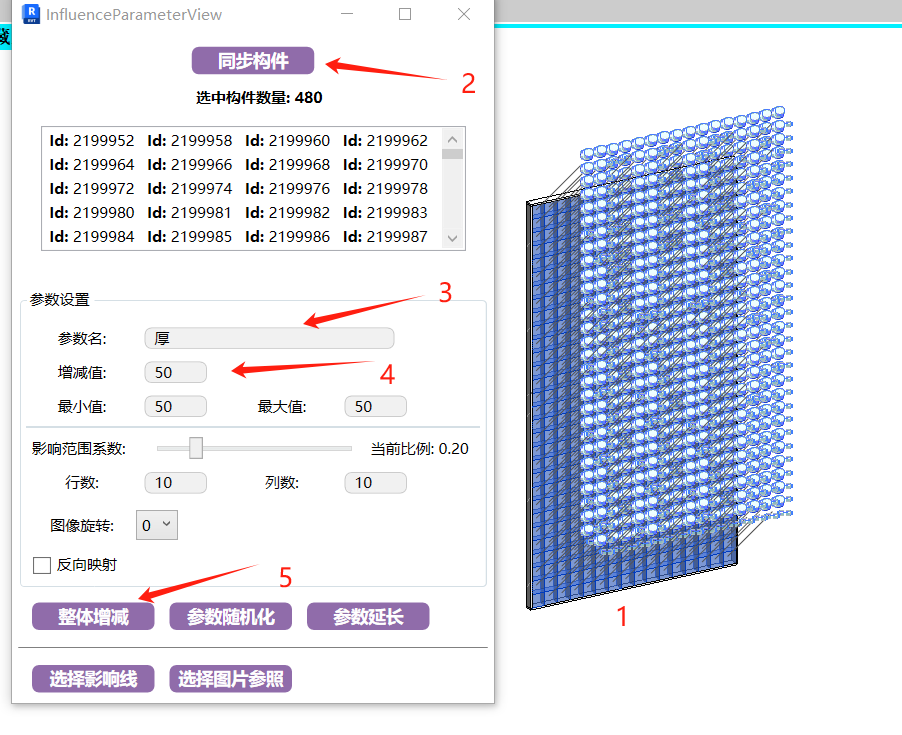
Select the components to be affected and sync them, enter the parameter name and increment value, then click the button.
# Parameter Randomization
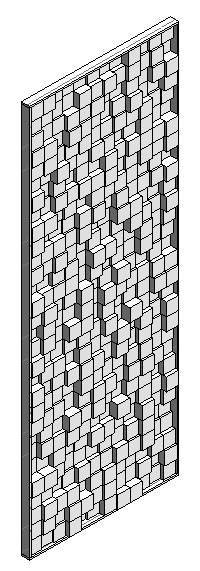
Select the components to be affected and sync them, confirm the model's instance parameter name, enter the minimum and maximum values, then click the function.
Randomization occurs between the min and max values. You can click multiple times to generate different effects.
# Parameter Extension
Extend rays in the parameter direction until they hit model obstructions to adjust parameter values.
This mainly applies to parameters that can extend in a specified direction, such as rod length. Parameters like radius cannot be extended.
Use case: When placing pendant lights at a specified level, you need to ensure the light heads are at the same level, but the pendant length is affected by the ceiling structure. You can use parameter extension to adjust all light fixtures to match the pendant length.
# Random Rotation
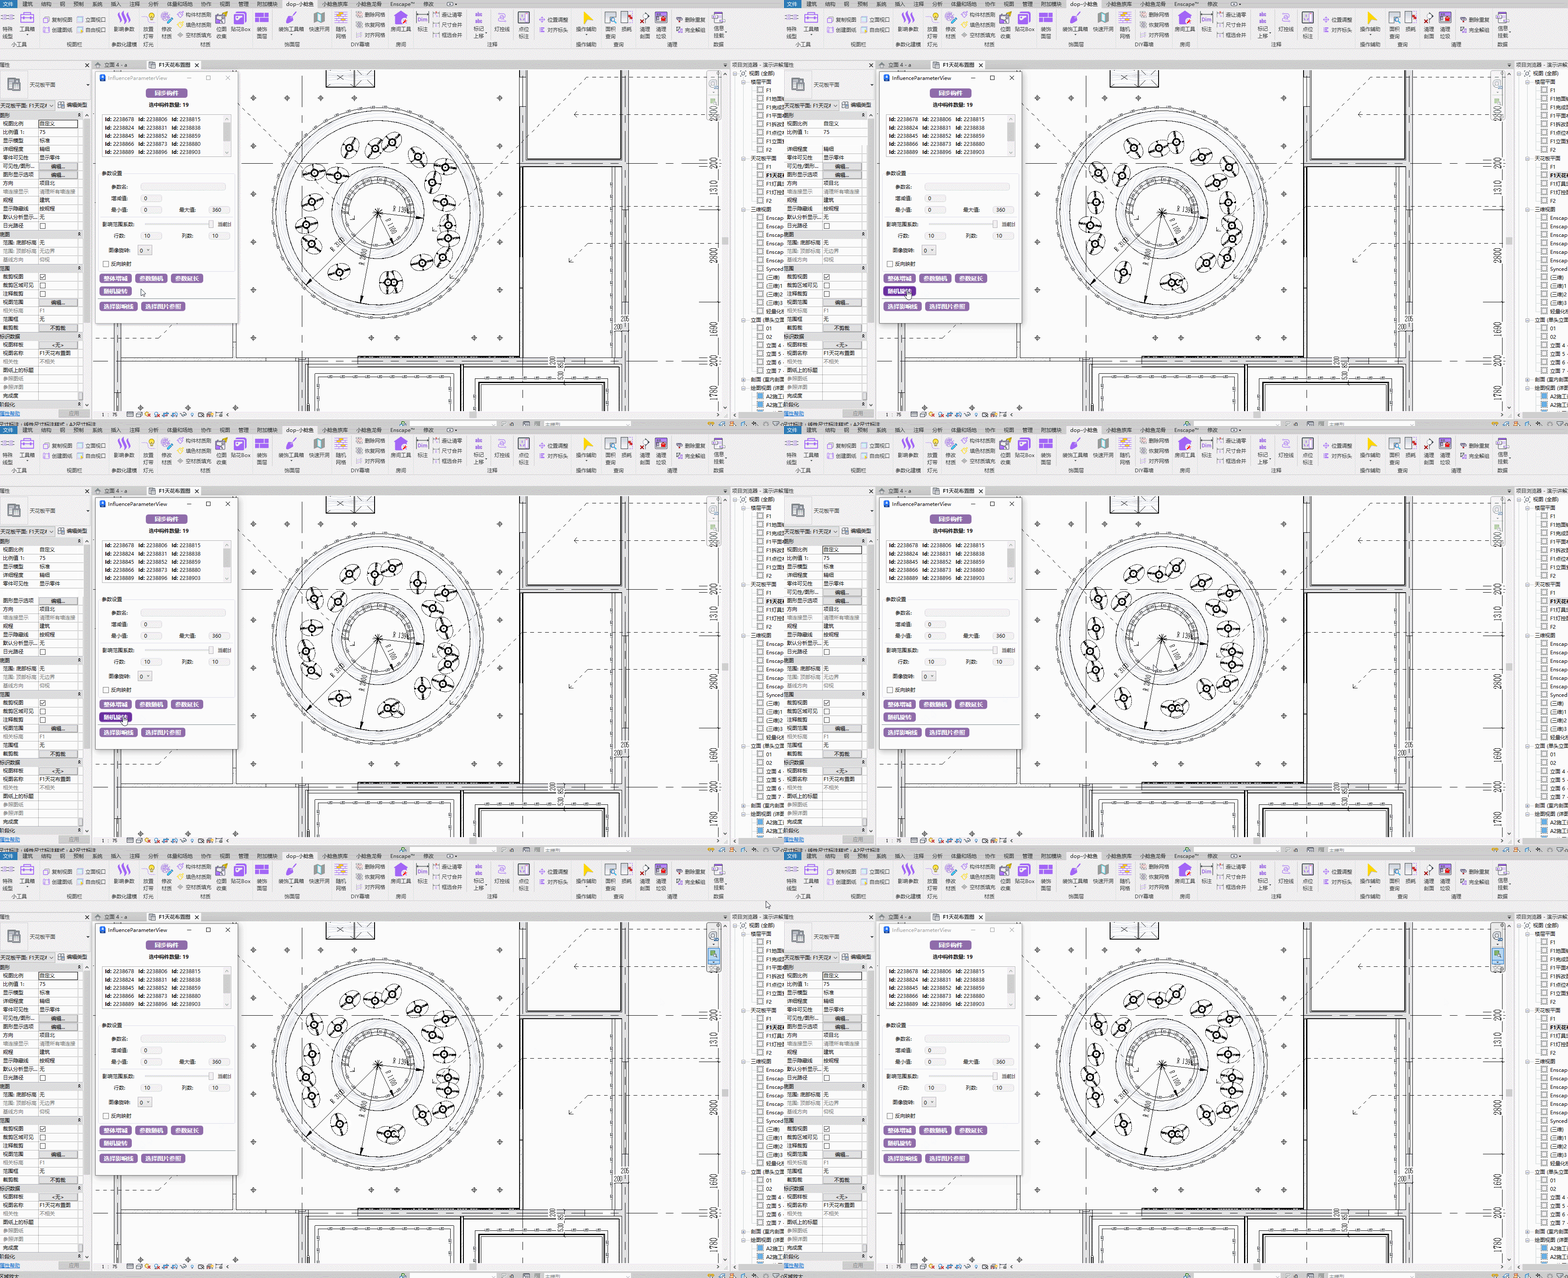
Randomly rotate components by a specified degree for a more flexible scene.
Watch tutorial video on Bilibili → Influence Parameters (opens new window)
# Select Influence Line
The influence line needs to be a 3D massing line, so you can adjust component parameters by modifying the massing line.
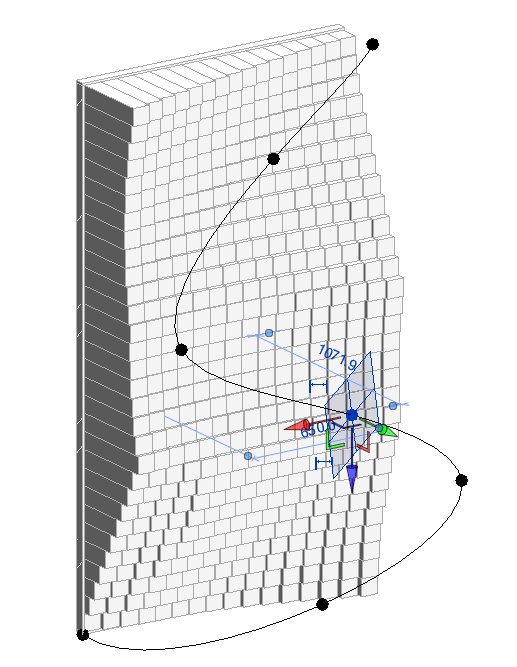
The principle is to calculate the distance from each component's center point to the nearest point on the 3D line, then map these values based on min/max values, with an influence range parameter.
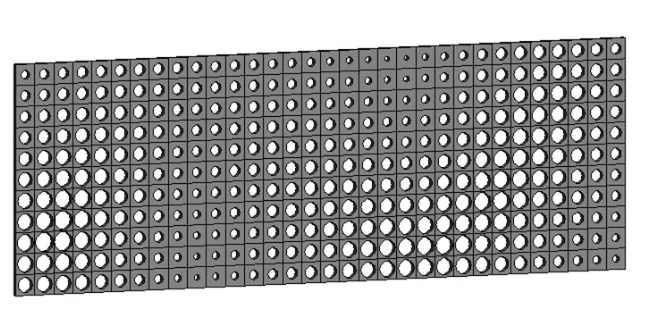
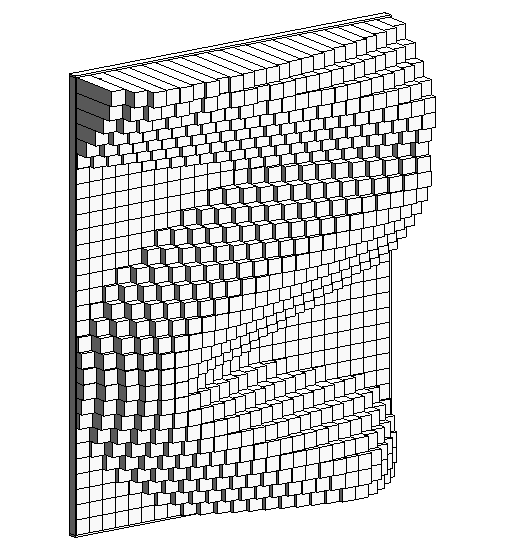
Based on the example below, you can explore various applications — not just length parameters, but also radius, scale factors, etc.
# Select Image Reference
Select an image, and adjust parameters based on the brightness of pixels in the image's row/column subdivisions. The min/max values map to the brightness range.
Higher row/column subdivision isn't always better.
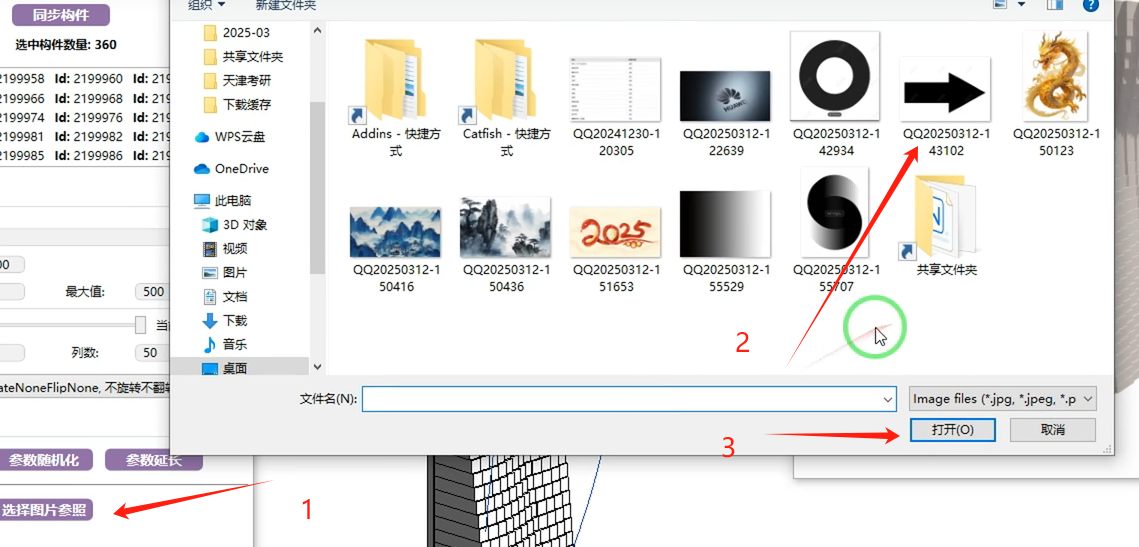
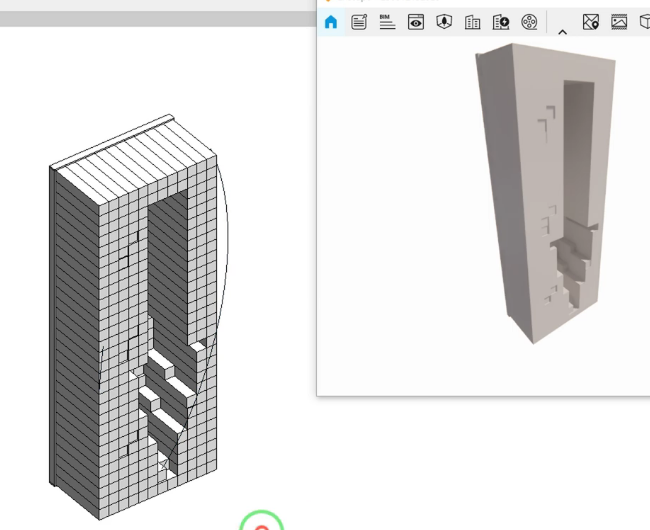
Use reverse mapping to flip the brightness relationship.
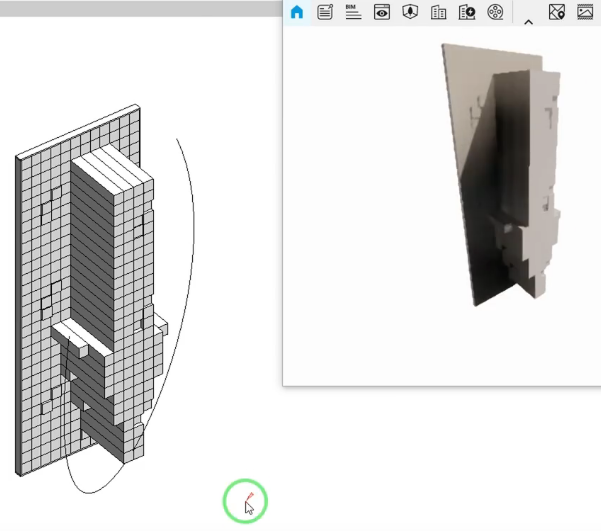
You can also adjust the influence effect directly through image rotation without modifying the source image.
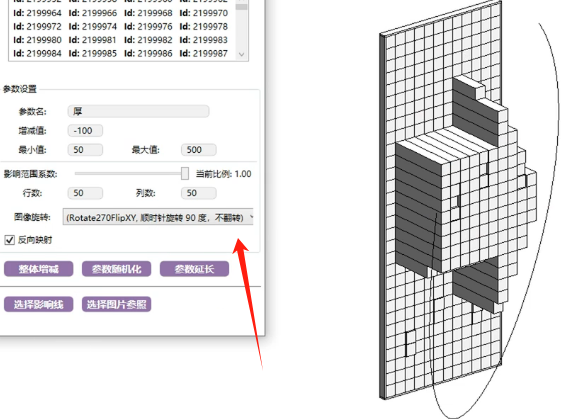
Watch tutorial video on Bilibili → Influence Parameters (opens new window)
# Image to Model
Adjust the brightness threshold for better contour extraction. Threshold must be 0-255.
# Relief Carving
Create from the black-and-white channel of an image.
The simplification coefficient in the parameters is recommended to be between 0.001-0.05 (higher values = more simplified pattern). Testing shows 0.002 works well. If generation fails at certain values, try increasing or decreasing.
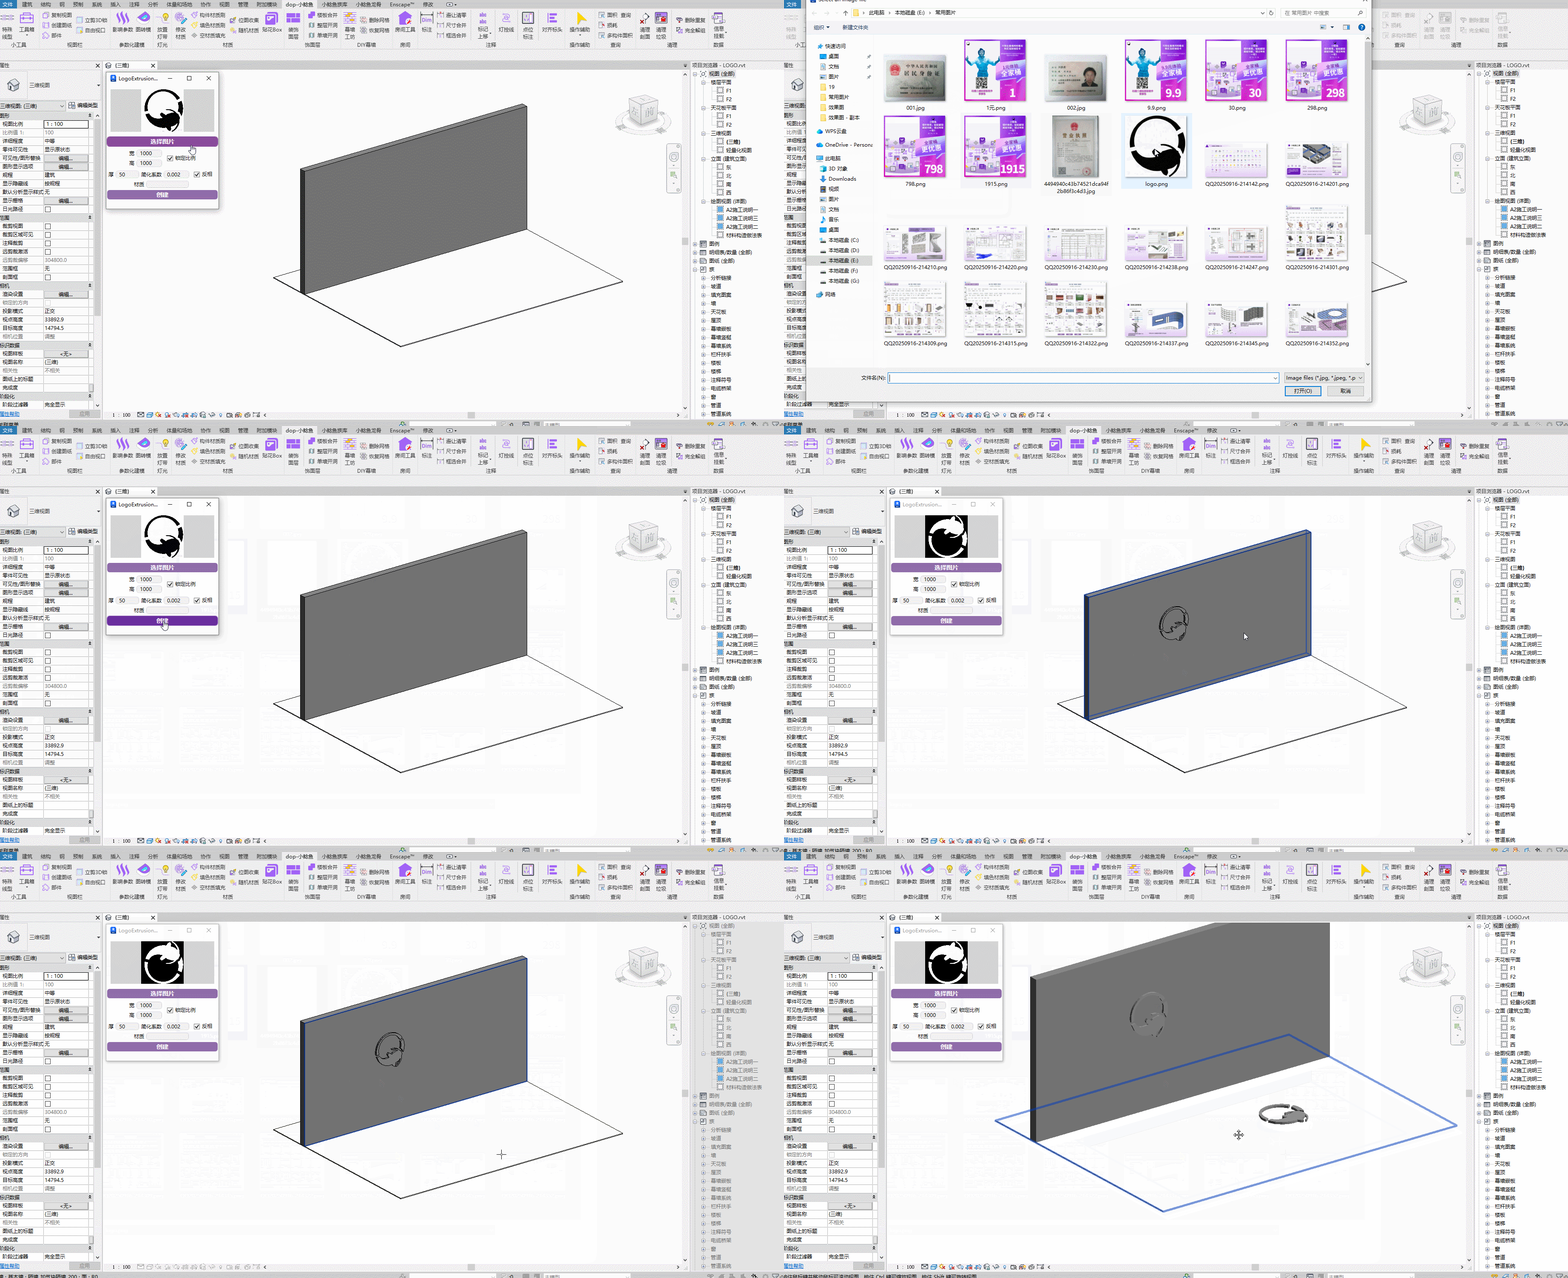
Steps: Select the reference image → Set parameters → Click the target surface.
Watch tutorial video on Bilibili → Image to Model (opens new window)
# Conform Relief
Mainly for adaptive modeling on picked geometric surfaces.
# Image Detail
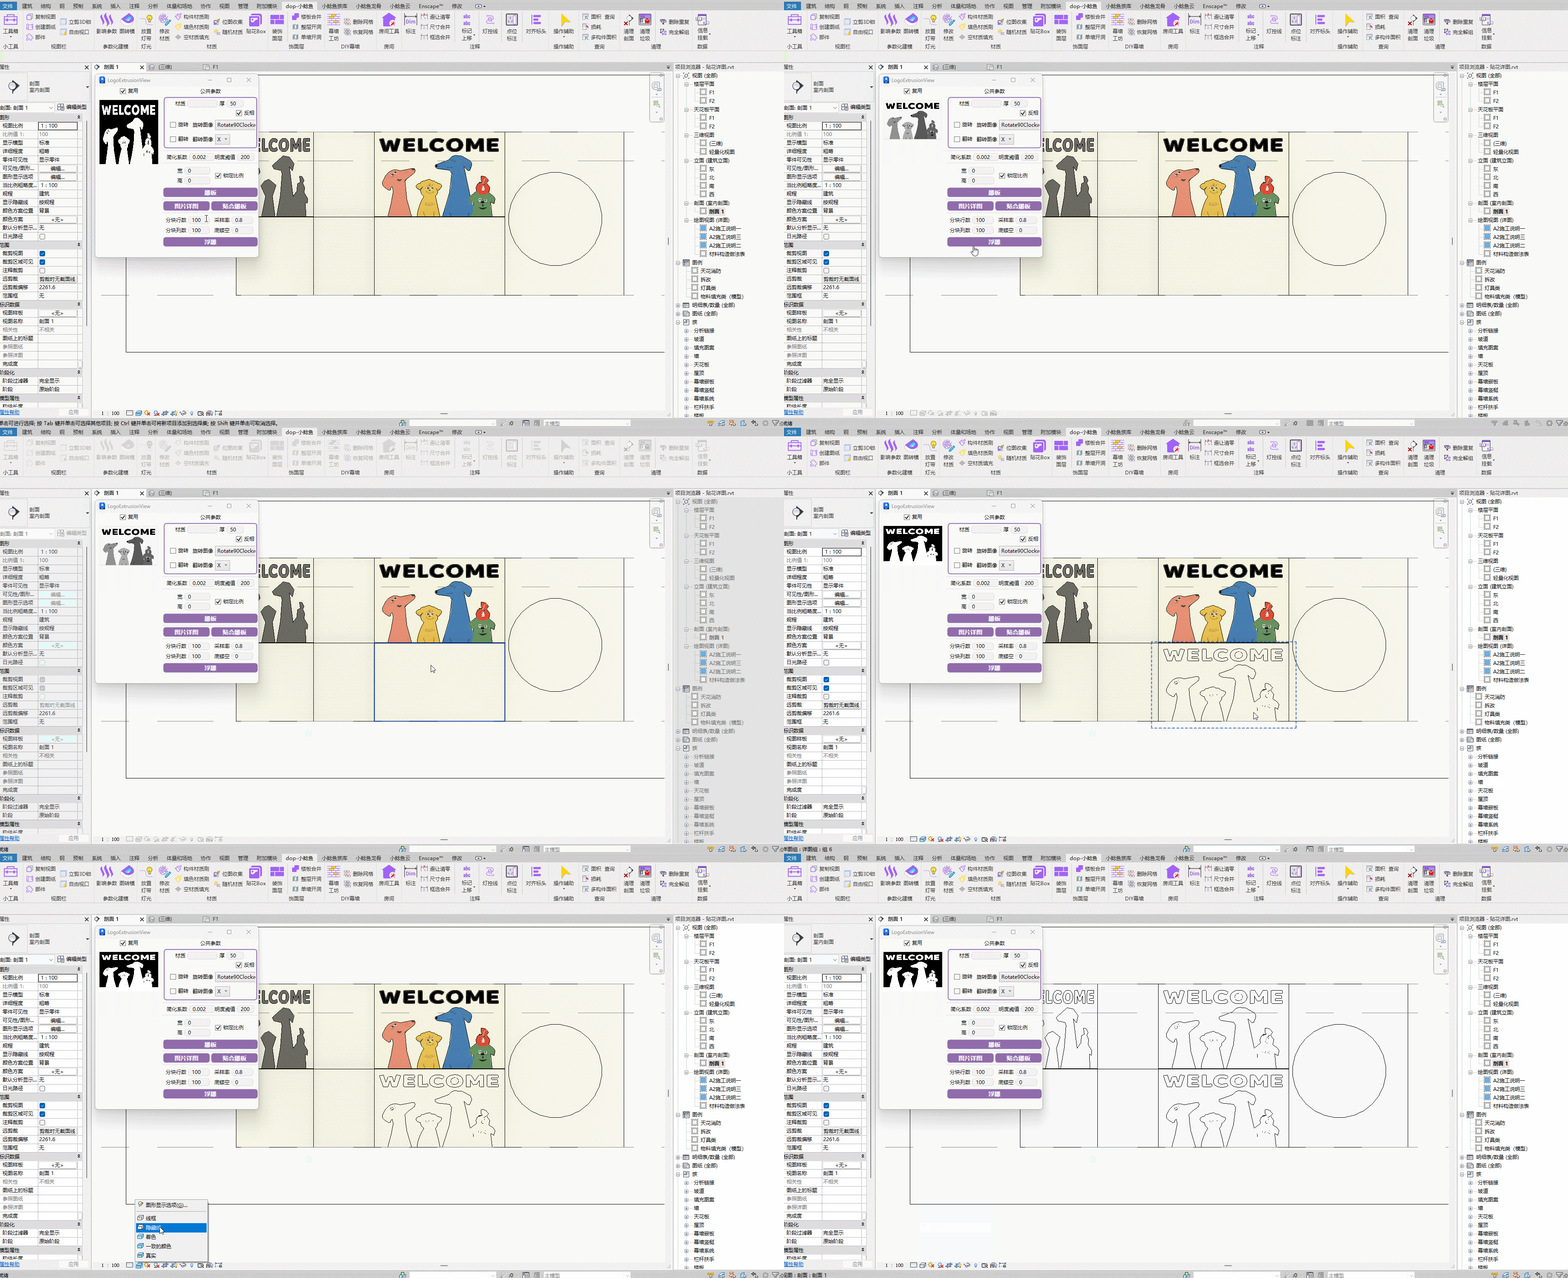
Steps: Set parameters → Select image → Click the target surface.
Watch tutorial video on Bilibili → Image Detail (opens new window)
Used to enrich construction drawing elevations.
# Bas-Relief
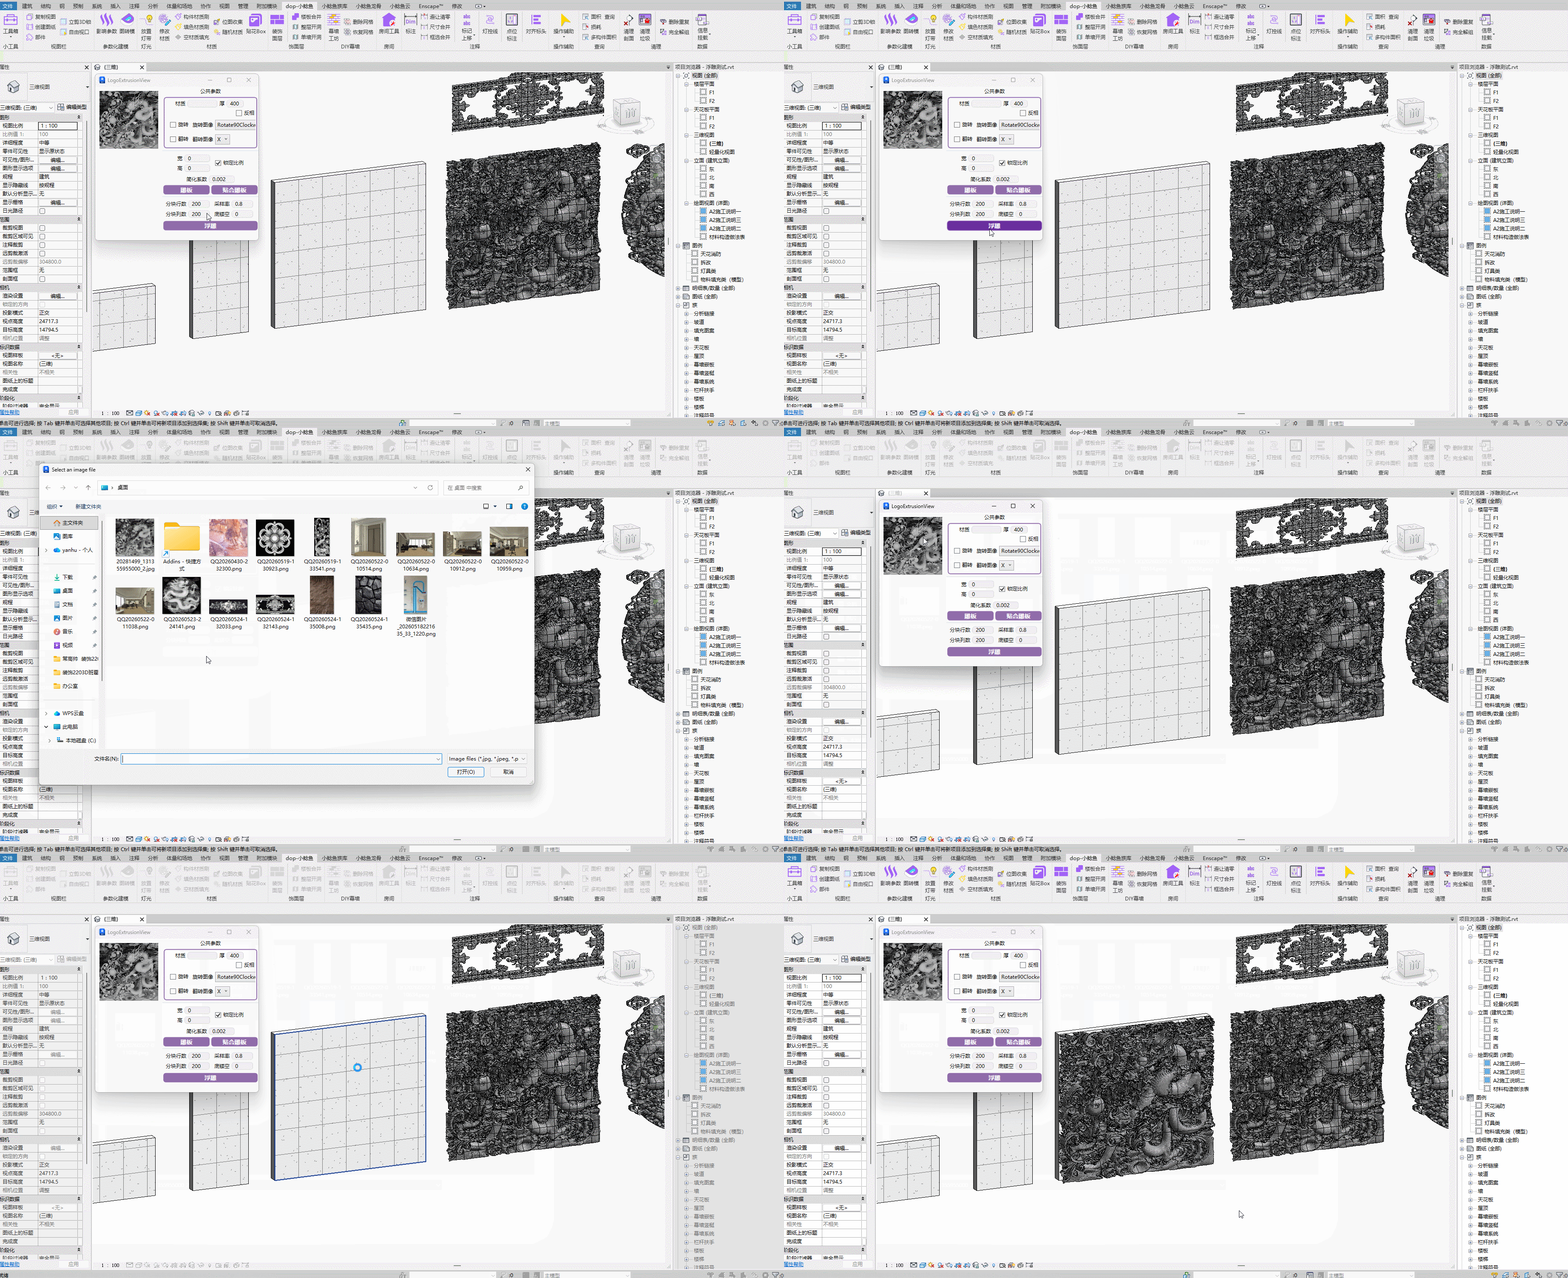
Steps: Set parameters → Select image → Click the target surface.
When selecting images, pixel quality matters — we recommend searching for dedicated black-and-white relief images.
Watch tutorial video on Bilibili → Bas-Relief (opens new window)
← View Toolbar Lighting →