# Annotations
# Dimensioning

Watch tutorial video on Bilibili → Dimensioning (opens new window)
One-click dimensioning: dimension, material annotation, level annotation.
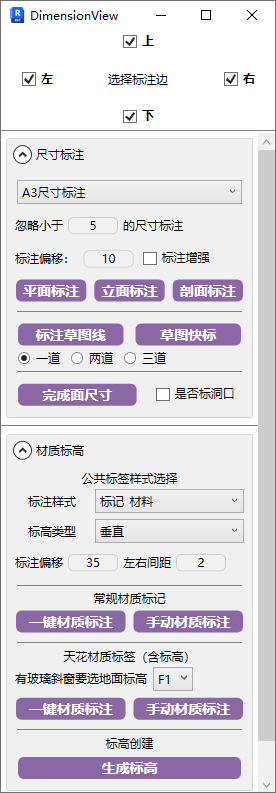
When dimensioning, pay attention to interior and exterior dimensions. Regenerating will clear previous annotations of the same type.
- Parameter Details
All annotation functions are based on the crop view range box. Adjust the view range box to the appropriate position before use.
- Select Dimension Edge: Determines which edge to dimension.
- When a dimension value is less than the set ignore value, it will be ignored. Dimension offset is based on the crop range box.
Before dimensioning, open the range box in the view and adjust it to the appropriate position.
# Special Line Types

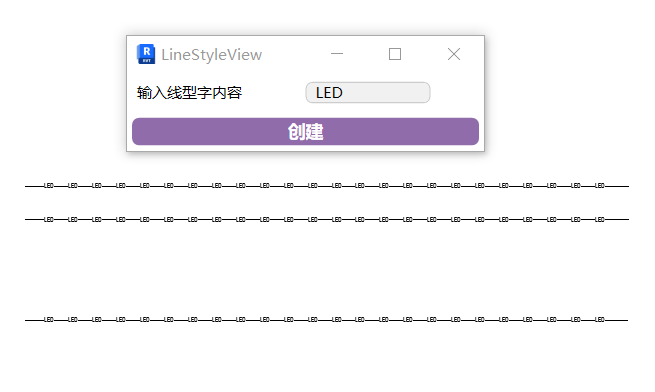
Add different symbol text to lines to distinguish line types.
- Parameter Details
Text Content: The text to display within the line segment.
- Steps
- Click the function, enter text content, click Create.
- Select the drawing method and line style, then draw in the view (cannot be created in 3D views).
- After creation, press Esc twice to exit and generate the special line type.
Note: The first creation in a project may have a delay. Subsequent creations will sync automatically.
Watch tutorial video on Bilibili → Special Line Types (opens new window)
# Plan Dimensioning
For linked models

Select the dimension type to use, set ignore and offset values, then click the function in the view to generate. Can be clicked repeatedly to regenerate.
# Elevation Dimensioning
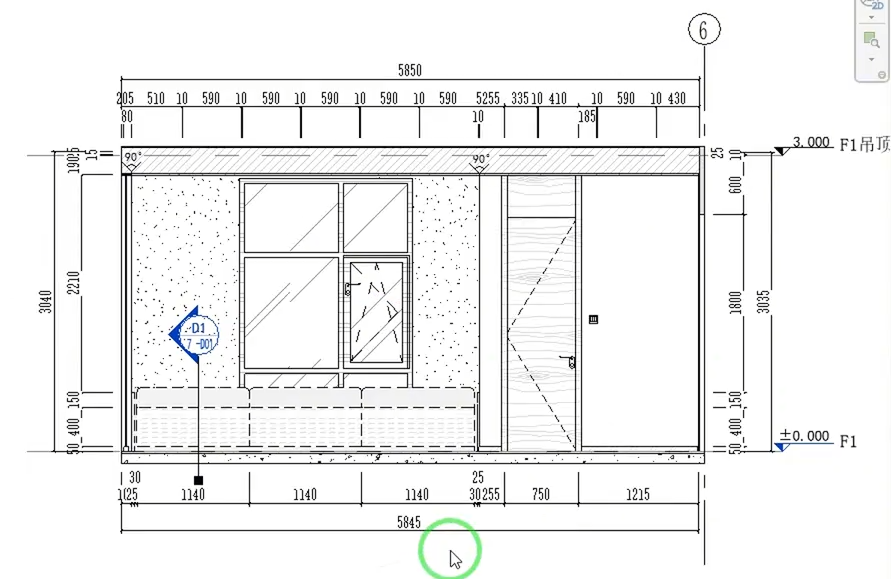
Same operation as above. You can select the dimension edges.
For elevation dimensioning, consider ignoring minimum values to avoid too many small dimensions in the elevation.
Due to the diversity of elevation views, some dimensions may not be perfect. You can manually adjust after generation.
# Section Dimensioning
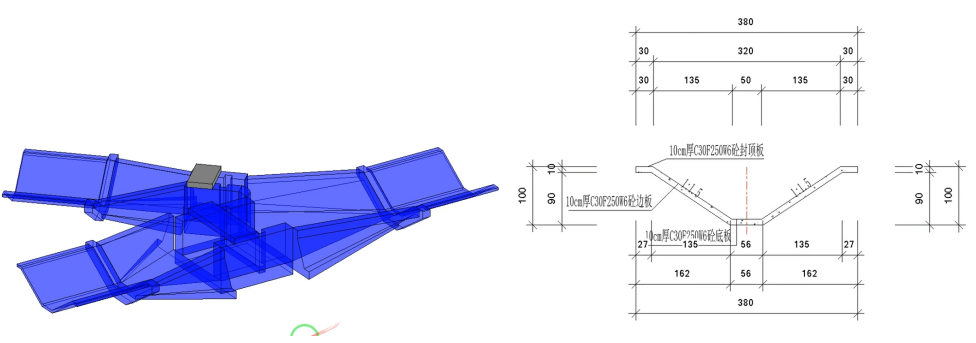
Can be applied to irregular structure section dimensioning. Enhanced dimensioning parameter can annotate sloped surface points.
Enhanced dimensioning is an algorithmic difference. Enable it when standard results are unsatisfactory.
# Sketch Quick Dimension
Click "Dimension Sketch Line" and draw at the location to be dimensioned. Press Esc to exit sketch drawing. (The sketch line must extend beyond the area to be dimensioned.) Then click "Sketch Quick Dimension", select the drawn line, and click the placement location to generate.
You can check the function below the sketch line to generate multi-floor dimensions at once.
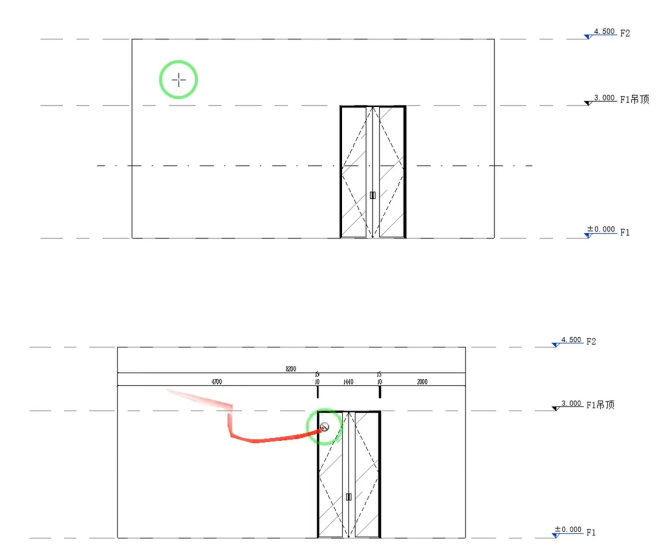
When drawing sketch lines, you can draw all areas to be dimensioned in one view at once, then pick to generate. Sketch lines must be perpendicular to the reference edge of the object to be dimensioned.
# Box-Select Quick Dimension
Quick dimension by rectangular selection. When box-selecting, imagine the selection box as a line — box-select where you need dimensions.
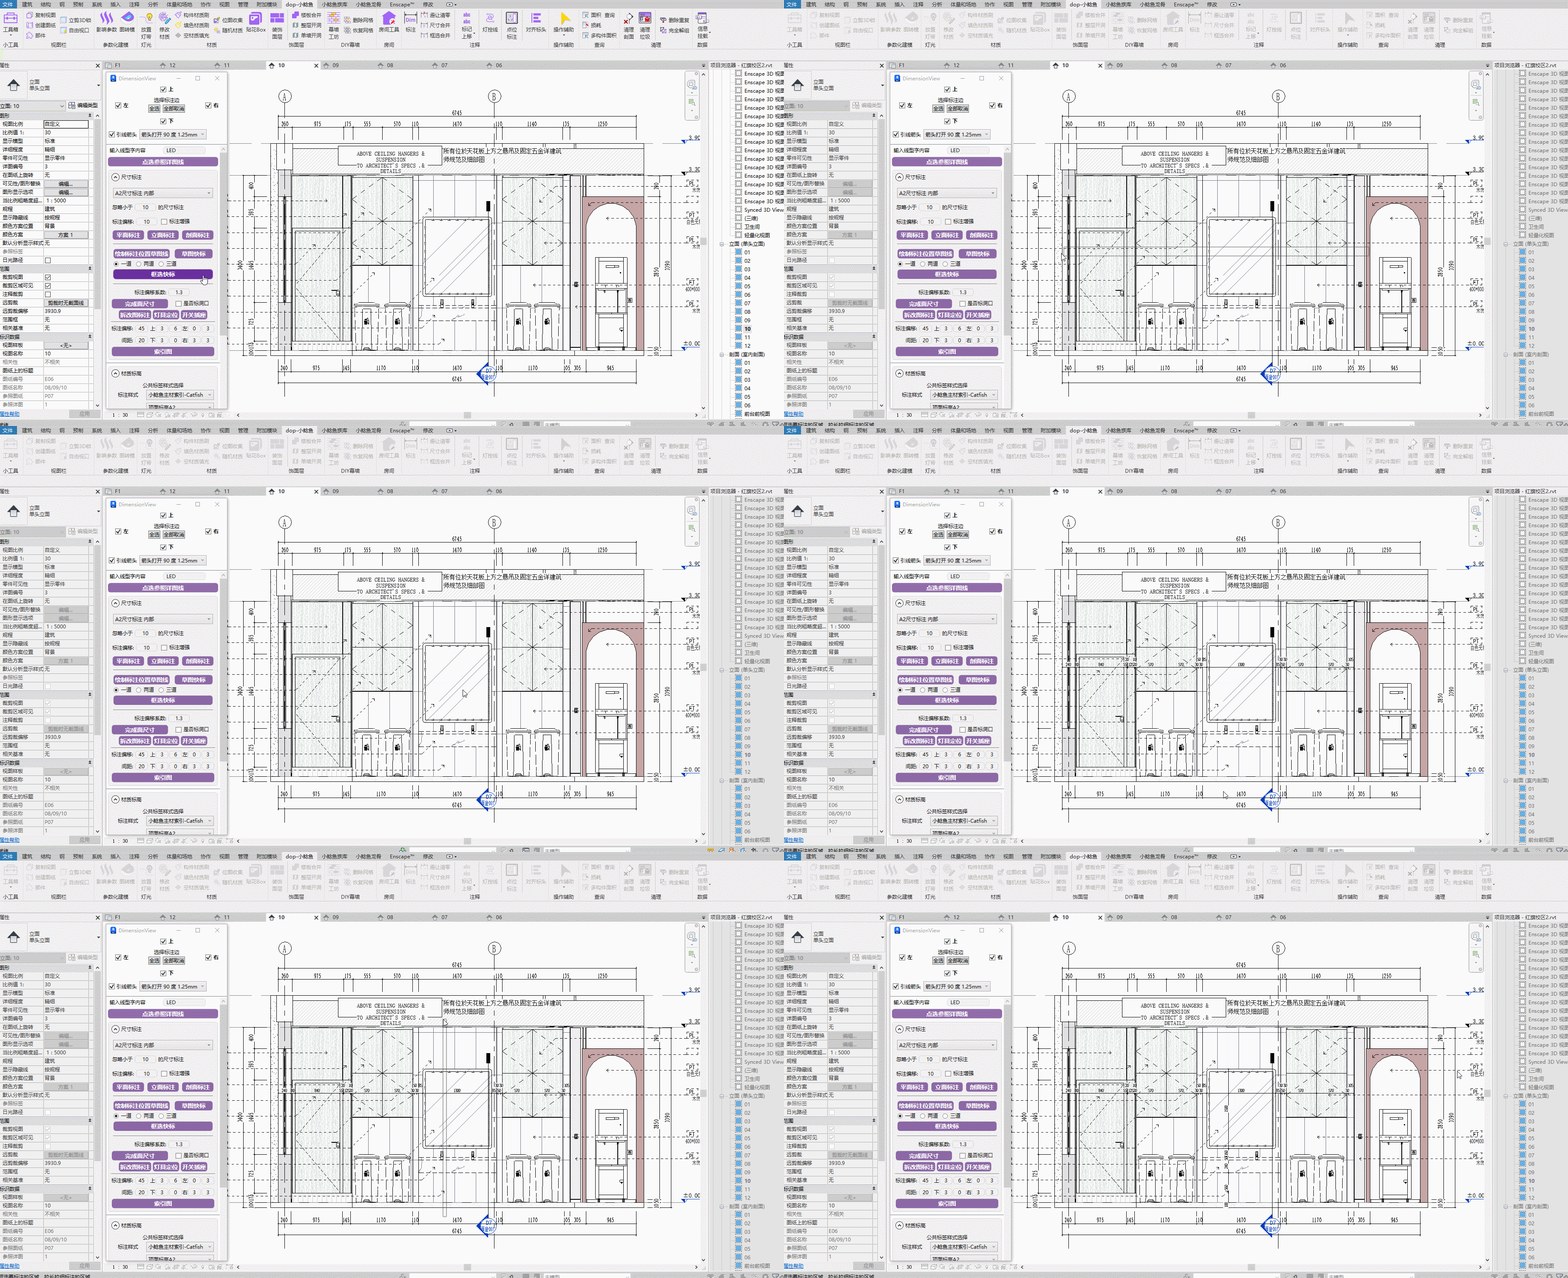
Steps: Draw a long selection box at the area to be dimensioned → repeat dimensioning.
The dimension position is at the center line of the long axis of the selection box.
Watch tutorial video on Bilibili → Box-Select Quick Dimension (opens new window)
# Finish Dimensions
Before using the tool, create rooms in the current view using batch room creation RM.
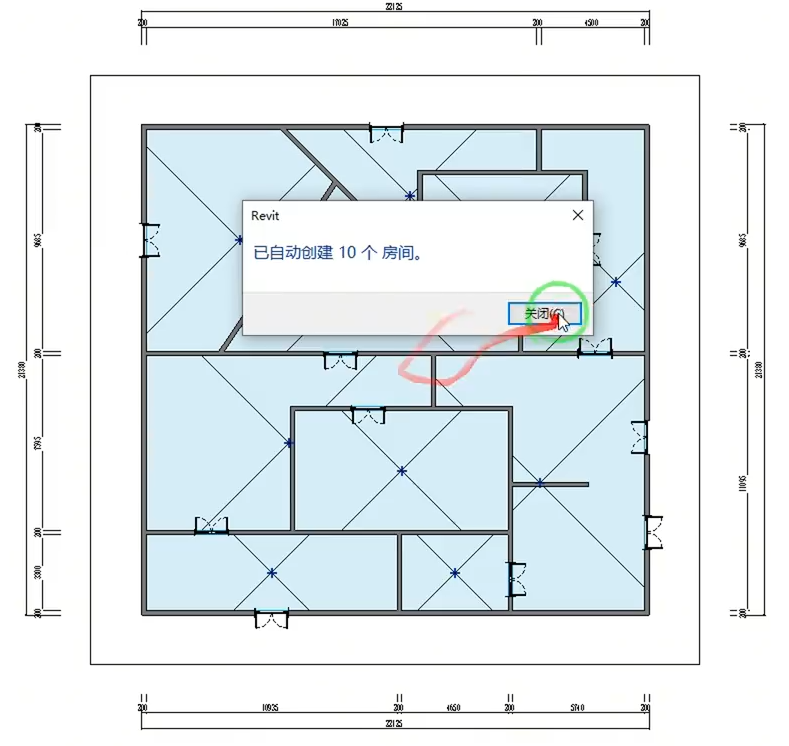
Select whether to annotate openings.
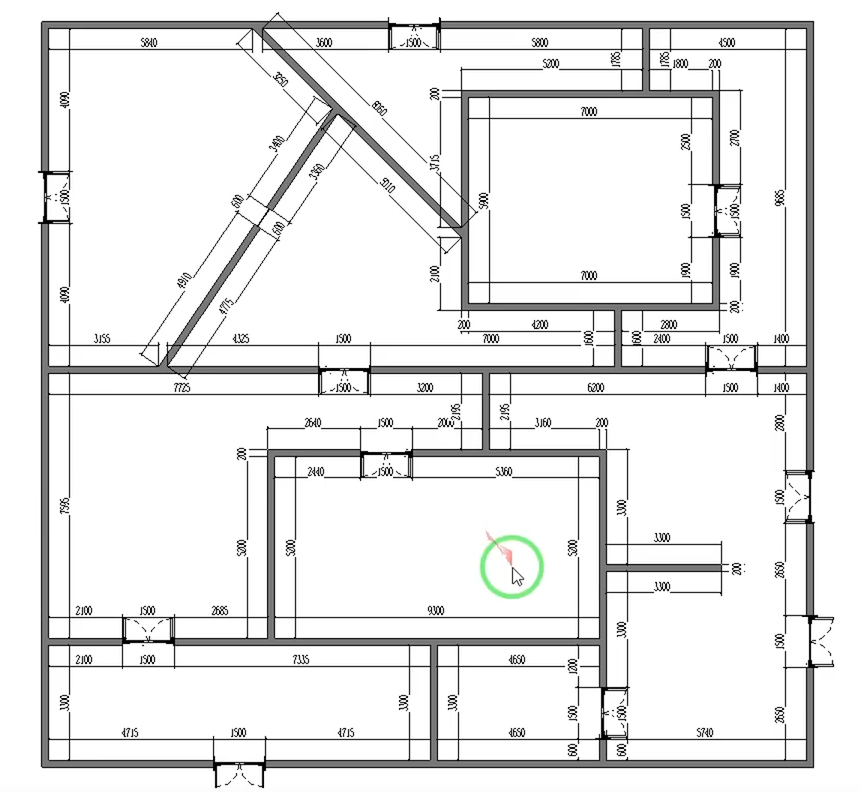
Can be used to annotate partition wall dimension drawings and finish dimension drawings. Note the distinction between interior and exterior dimension types.
# Demolition Drawing Annotation
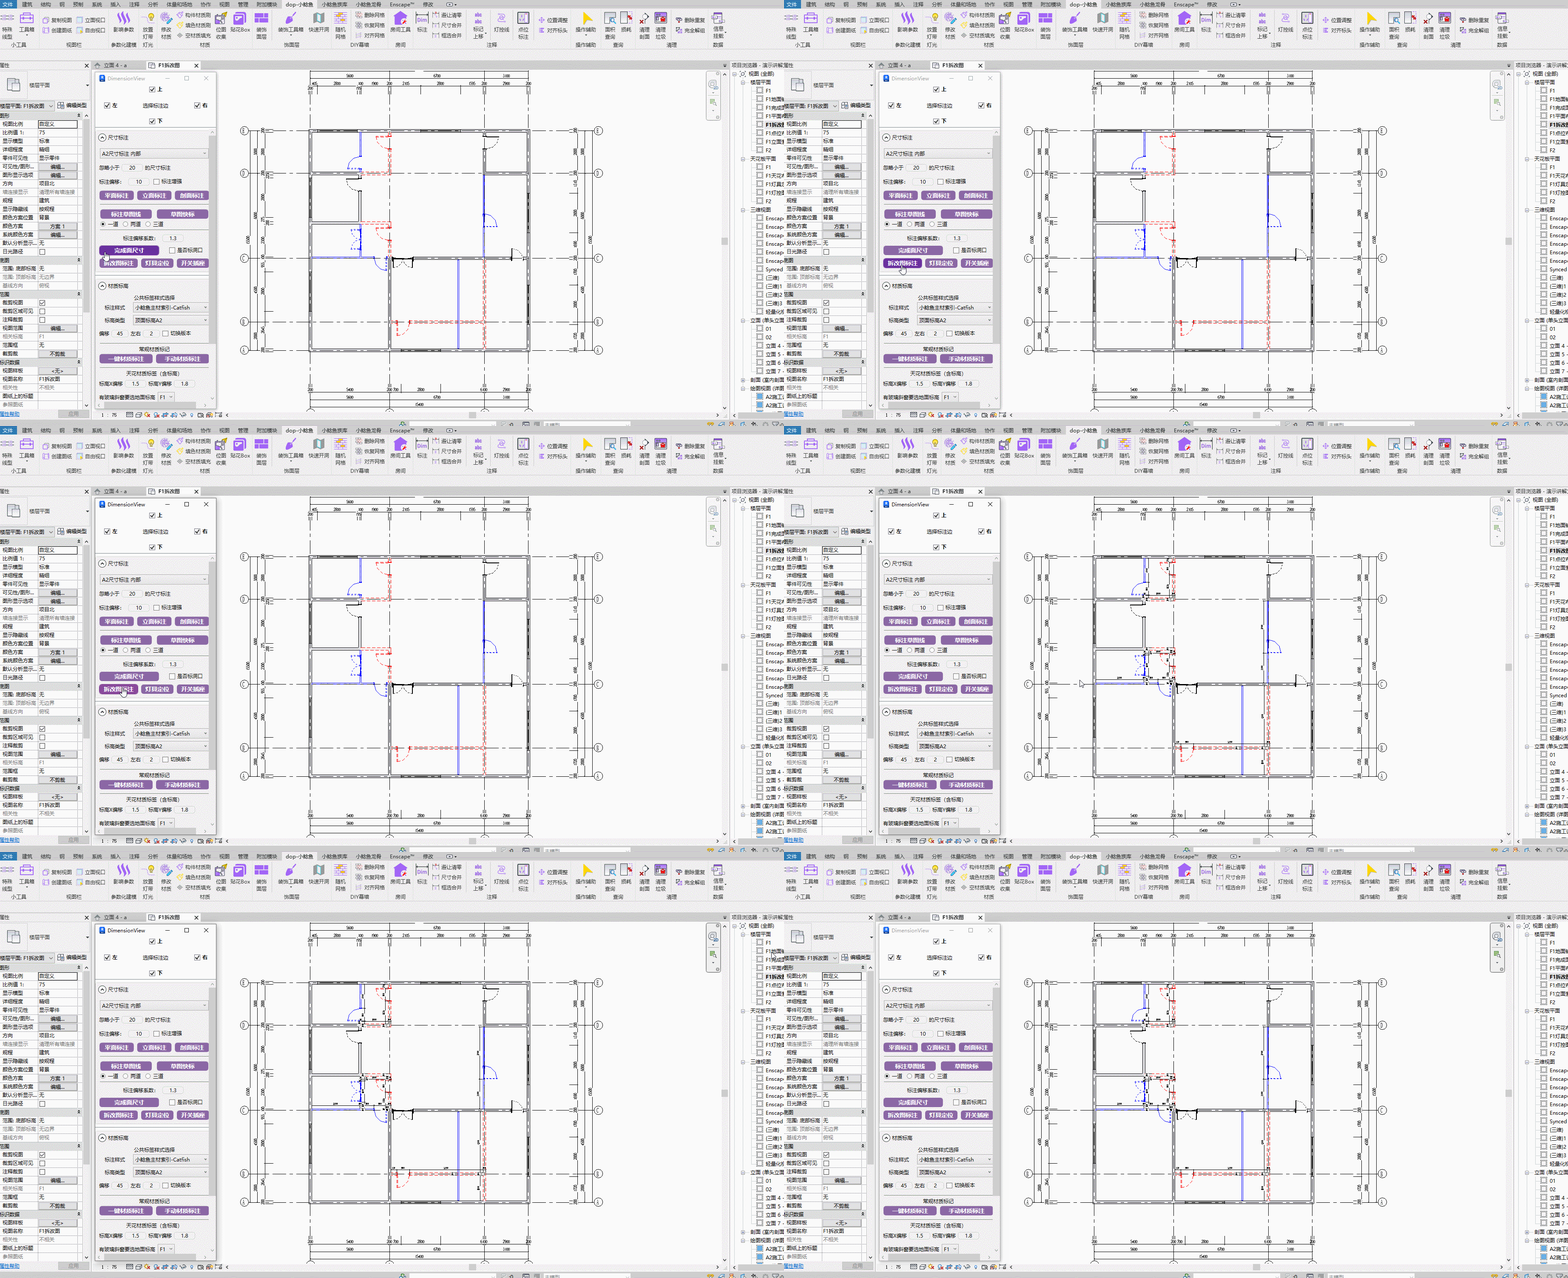
Watch tutorial video on Bilibili → Annotation (opens new window)
# Light Fixture Positioning
When box-selecting, only select light fixtures on one line.
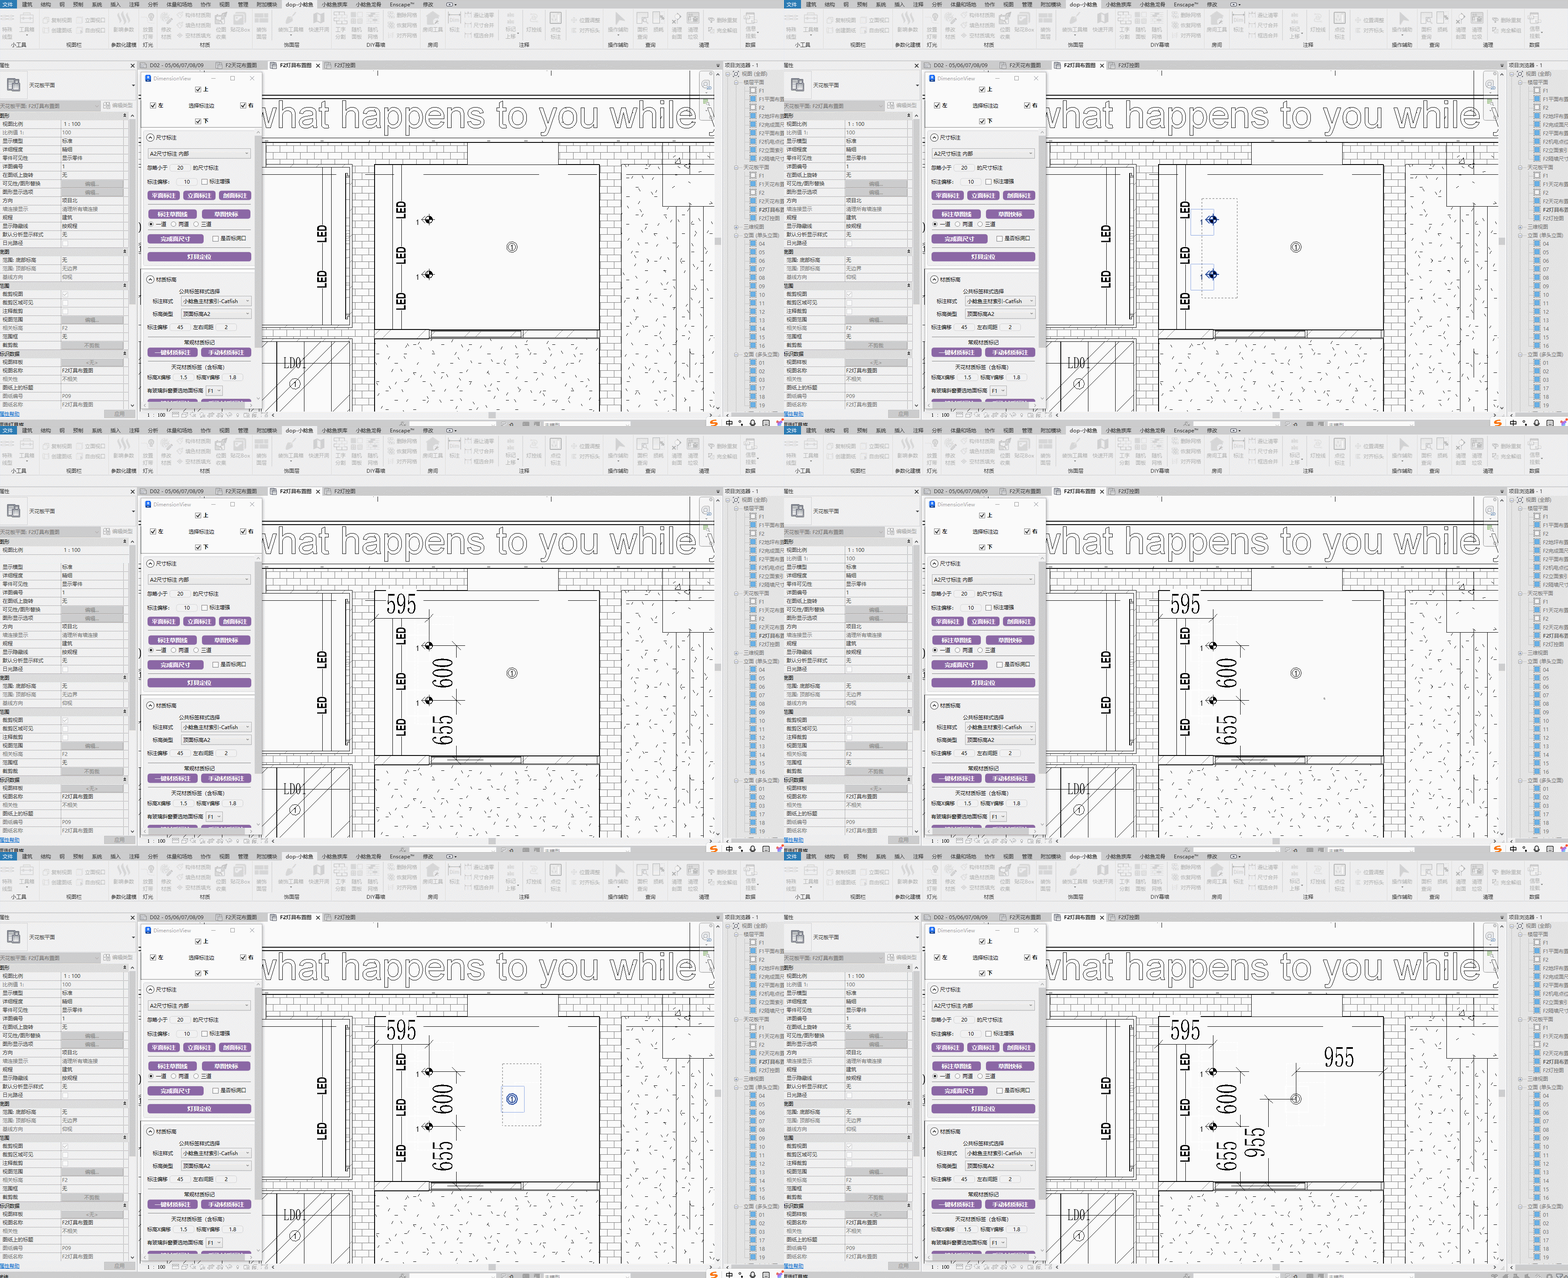
Watch tutorial video on Bilibili → Annotation (opens new window)
# Switch & Outlet Annotation
Ensure switch and outlet types are electrical devices.
When box-selecting, only select switches and outlets on one line.

Watch tutorial video on Bilibili → Annotation (opens new window)
# Detail Index
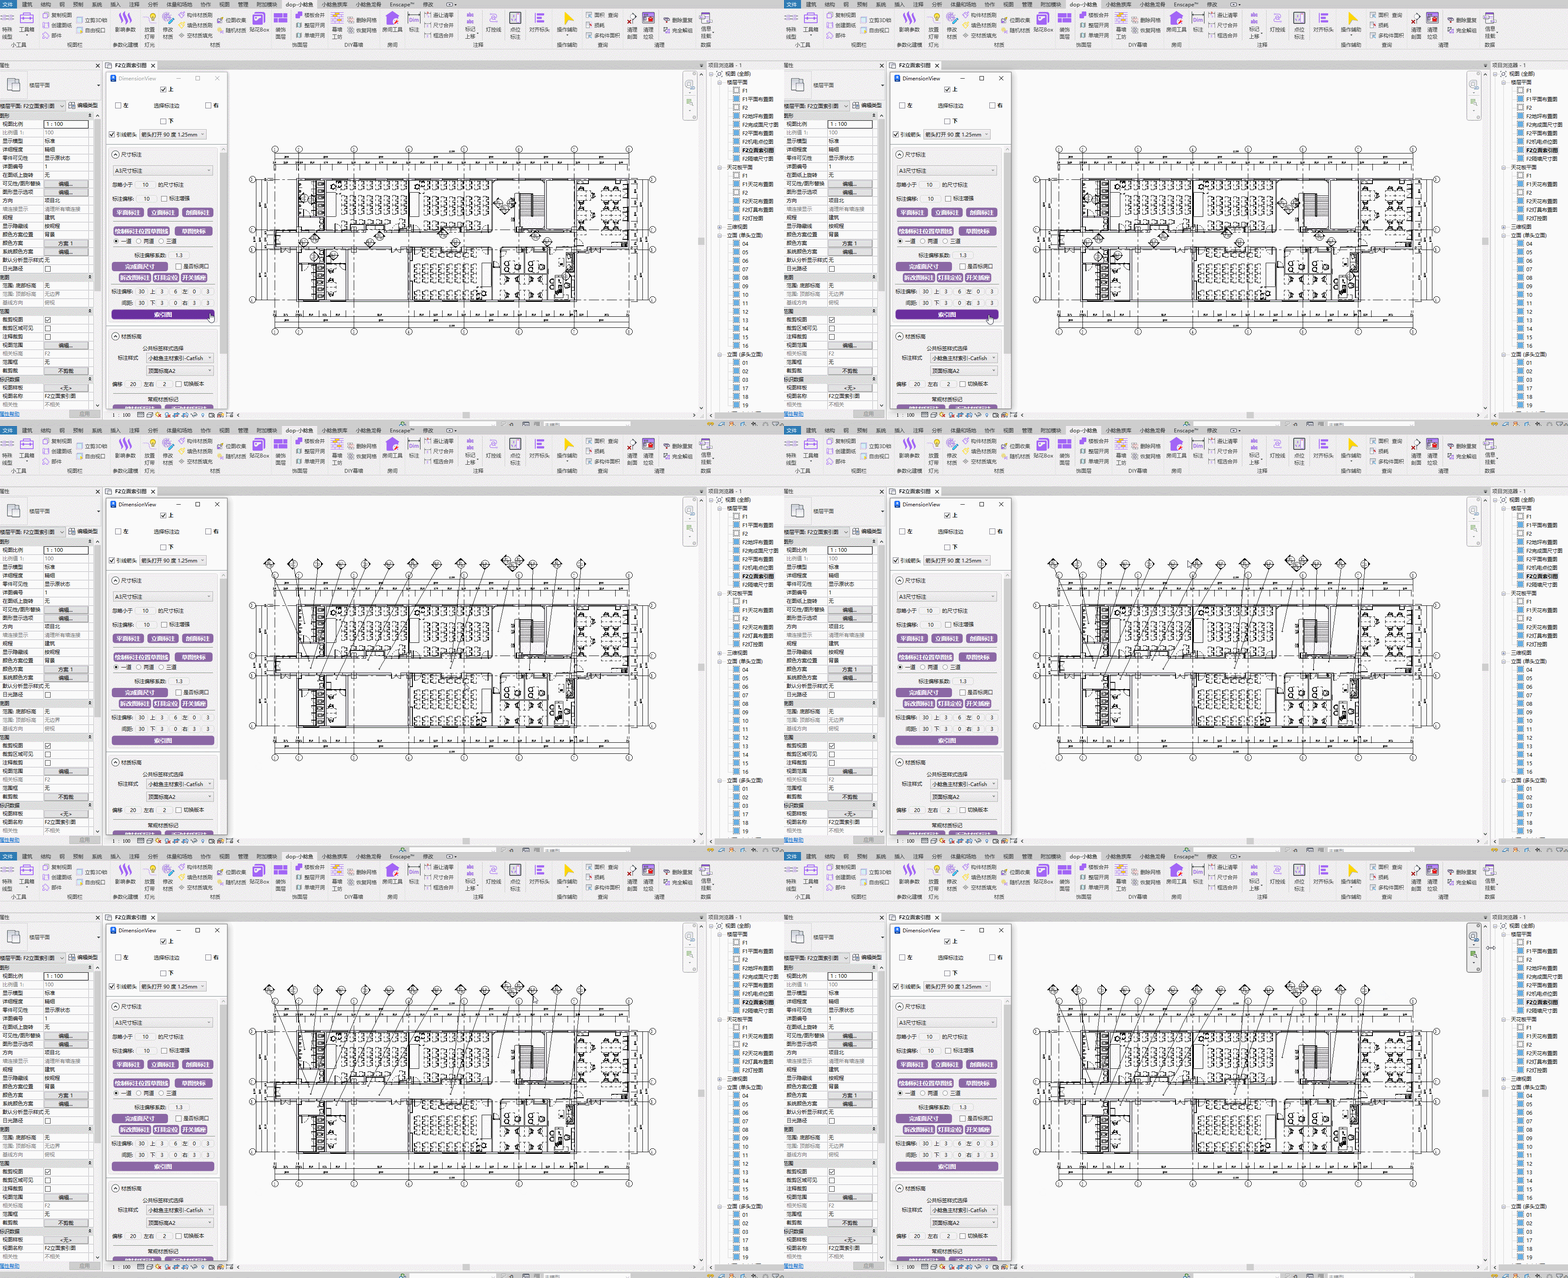
The values for up/down/left/right in the parameters correspond to the X and Y axes of the drawing. Adjust the leader endpoint offset based on your elevation symbol size. Set parameters once — they will be saved for future use.
Watch tutorial video on Bilibili → Annotation (opens new window)
# Material Annotation
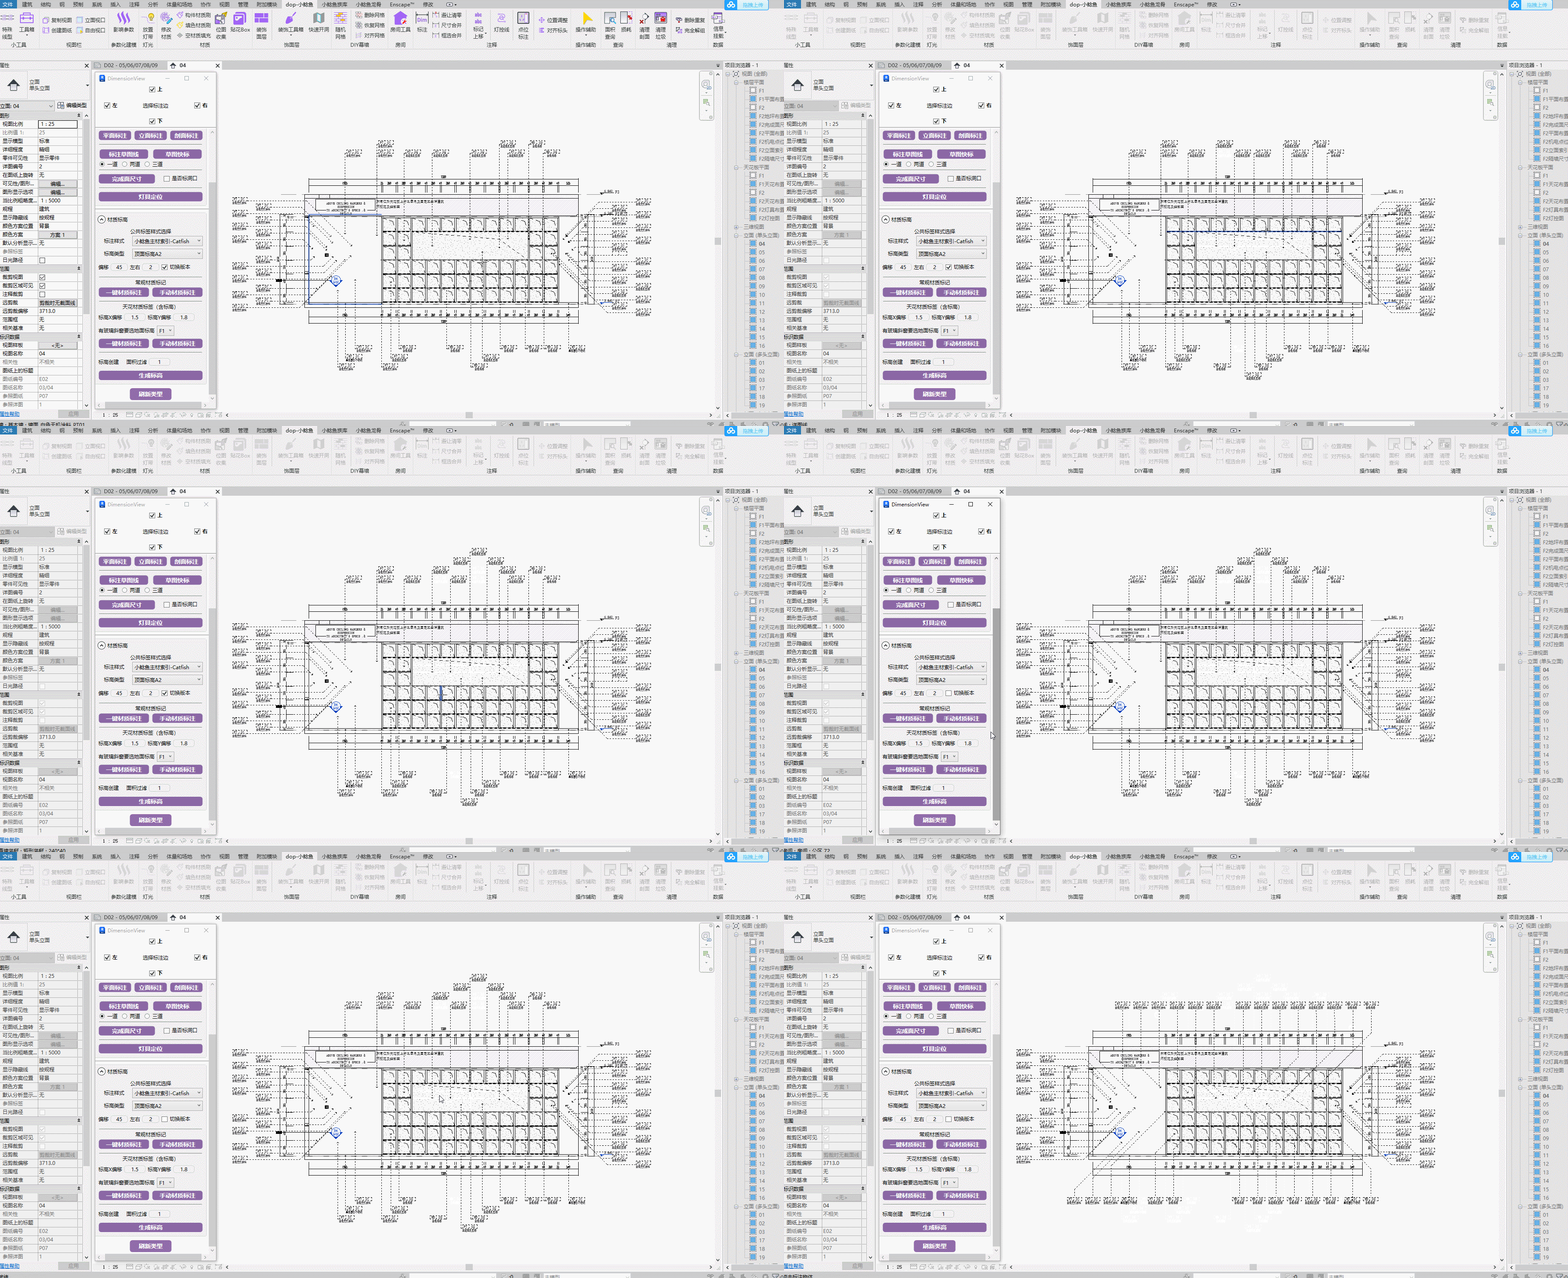
Layout options include four-direction quadrant diagonal layout and vertical layout. Select your preferred layout in the window. When the number on one side reaches a certain limit, it will wrap to a second row to save space.
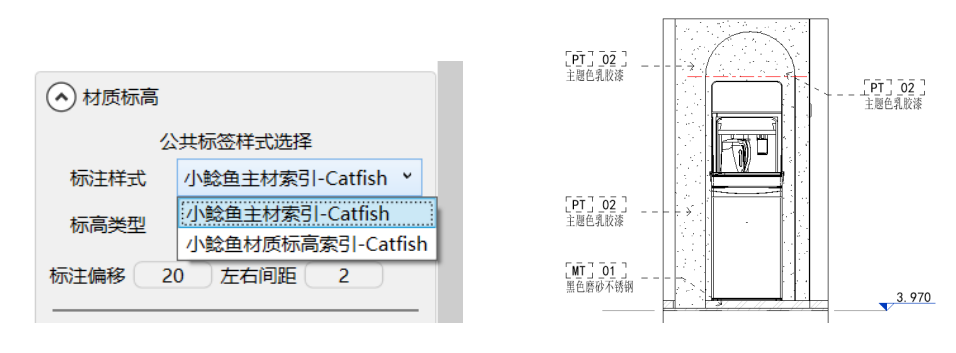
You can choose from built-in tag header styles or use your own.
Annotation is divided into One-Click Material Annotation and Manual Material Annotation.
One-click annotation automatically annotates and arranges based on component materials in the view. When supplements are needed, use manual annotation for different items. New annotations will be rearranged based on existing layout.
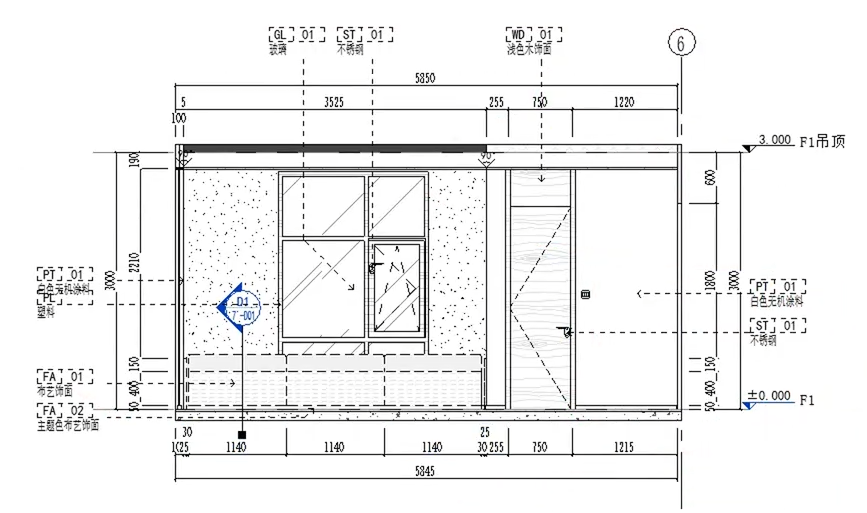
Set the offset distance and direction according to your preference.
After using manual supplementary annotation, don't use one-click annotation again — it will clear all previous annotations and regenerate.
For floor material drawing creation, it's recommended to create floors by room for easy one-click material recognition.
Watch tutorial video on Bilibili → Manual Annotation Notes (opens new window)
# Ceiling Material Annotation
When creating levels in the ceiling plan, both "Dimension Style" and "Level Type" are used simultaneously.
For level type, select a type that only retains annotation text without a tag head (create your own type).
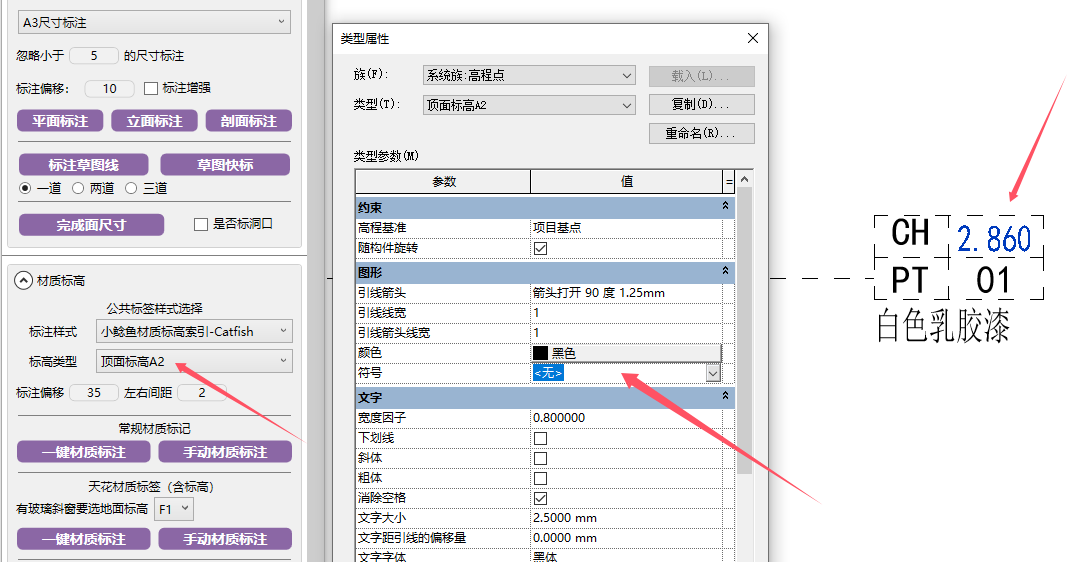
When annotating panels in glass sloped glazing, pay attention to selecting the relative floor level. Since Revit cannot annotate glass sloped glazing panels natively, the plugin identifies and fills in the values.
Ceiling annotation level text offset issues have been found in Revit 2018 and 2020. We recommend using other versions.
Other components are not affected by this parameter.
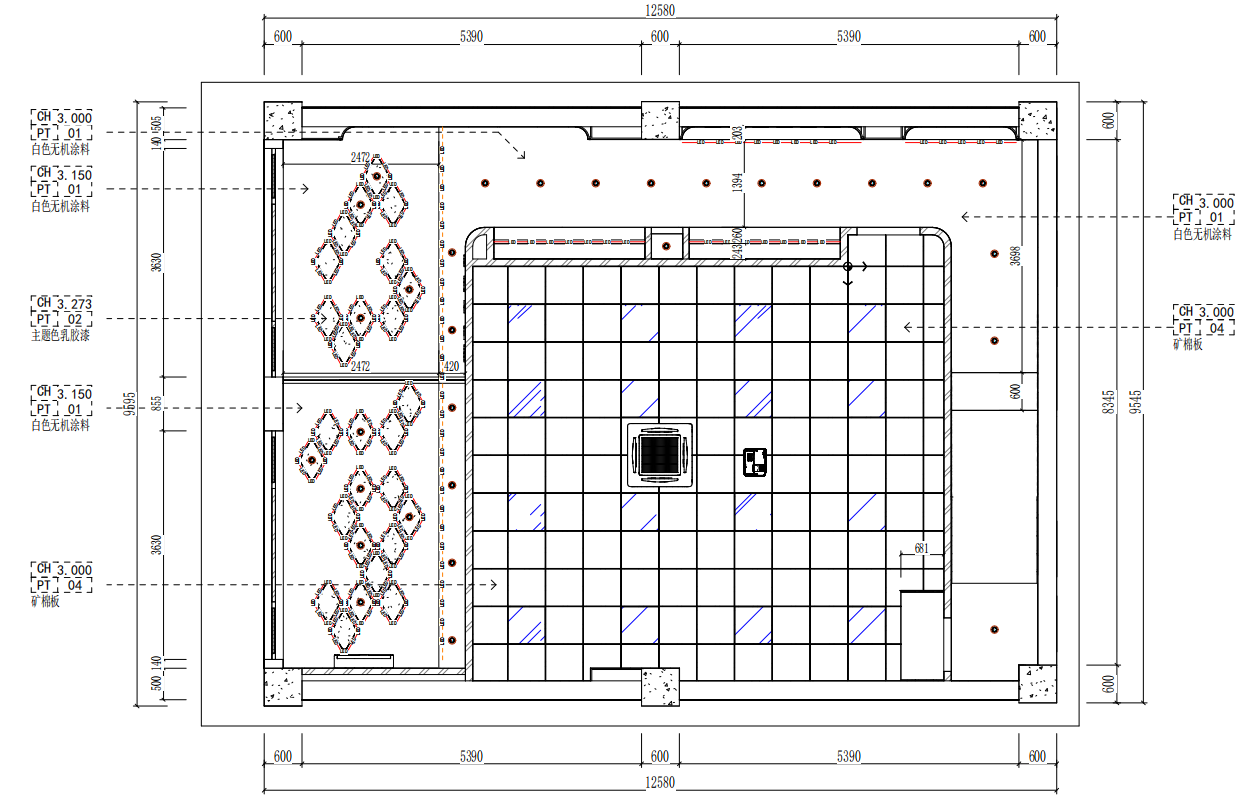
For ceiling drawing creation, it's recommended to create ceiling floors by room for easy one-click material recognition.
Watch tutorial video on Bilibili → Ceiling Material Annotation (opens new window)
Watch tutorial video on Bilibili → Ceiling Material Level Creation Notes (opens new window)
# Level Creation
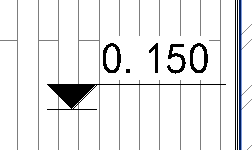
Level creation is related to components. It's recommended to create floors by room.
# Collision Avoidance & Zero Clearing

Avoid overlapping numbers in crowded dimensions, and clear zero values from annotations.
Operates on all dimensions in the view. Recommended to use after all annotations are complete.
# Dimension Merge

Click the function, select the dimensions to merge, then click the placement direction.

Watch tutorial video on Bilibili → Collision Avoidance & Dimension Merge (opens new window)
# Cleanup Witness Lines

Box-select dimension witness lines to delete. They can be deleted directly. Box-selecting two lines will trim them synchronously.
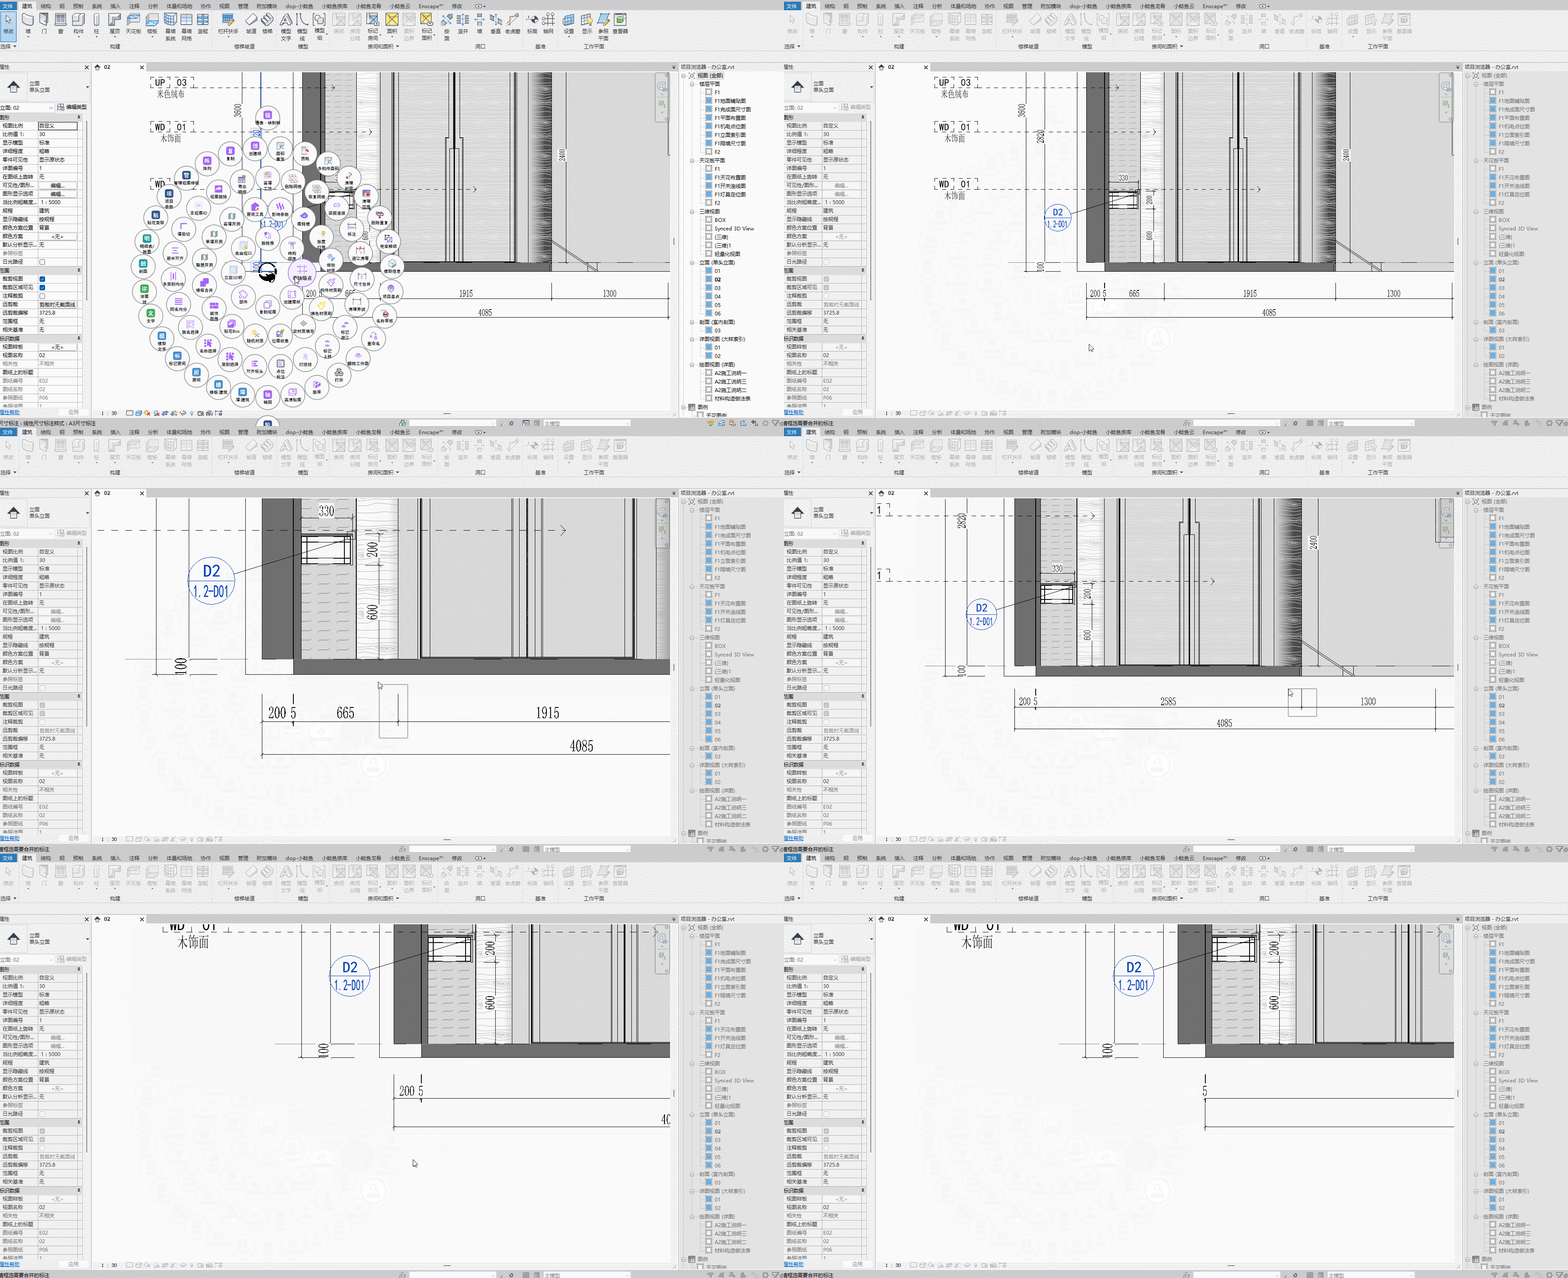
Watch tutorial video on Bilibili → Cleanup Witness Lines (opens new window)
# Tag Move Up

Move tags above families for batch family tagging, avoiding overlap between tags and families.

# Tag Avoidance

If tags are too crowded, use avoidance to spread them out.
Watch tutorial video on Bilibili → Tag Move Up & Avoidance (opens new window)
# Lighting Control Lines
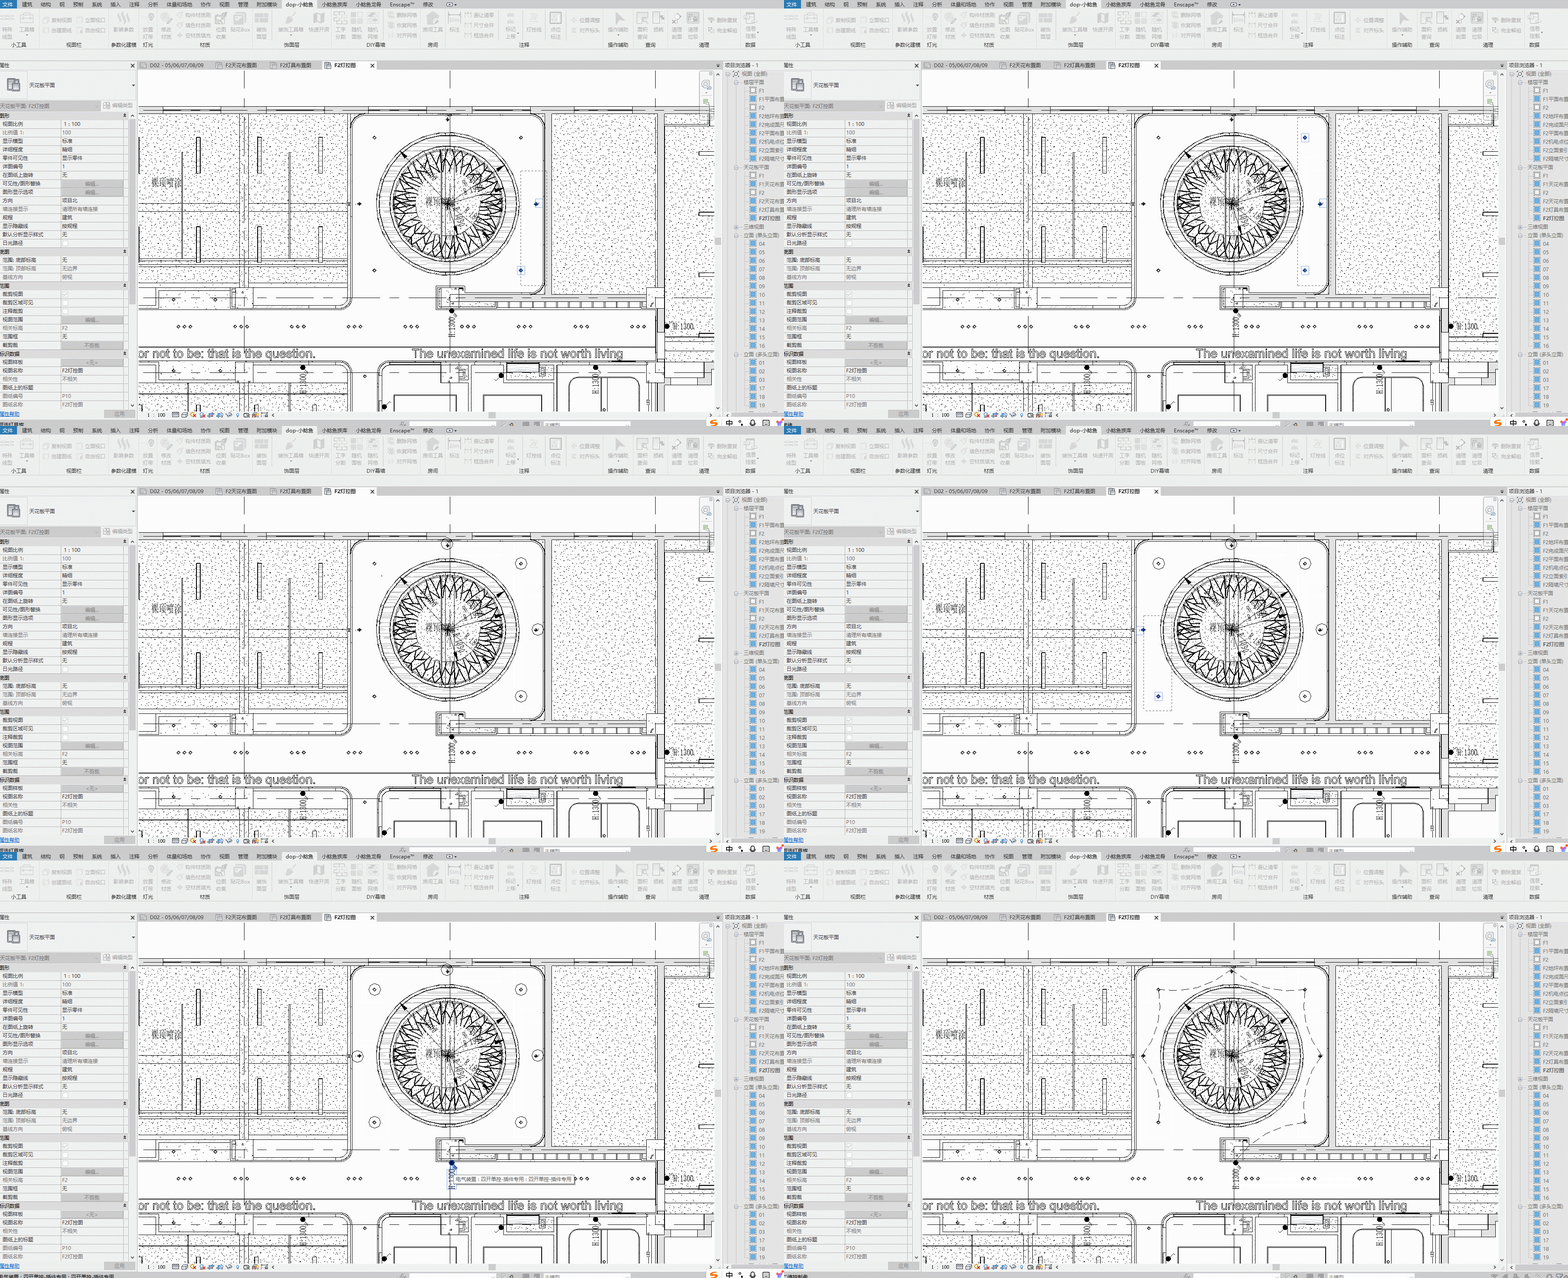
First selection: lighting device families, multiple box-selects, press Esc to finish.
Second selection: non-lighting device families, multiple picks, press Esc to finish.
Third selection: switches.
# MEP Point Annotation

- Parameter Details
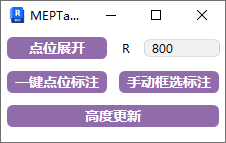
- R is the radius for grouping and arranging points in the drawing. Points within the range circle will be grouped together for annotation layout.
# Point Annotation / Manual Box-Select
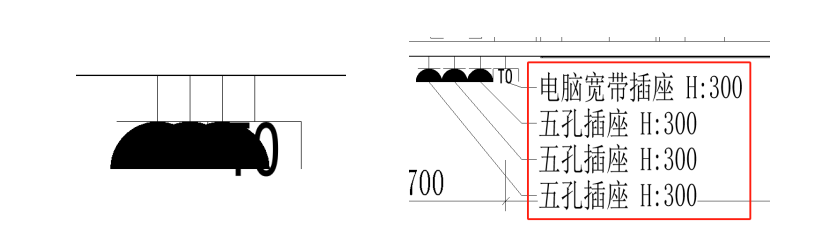
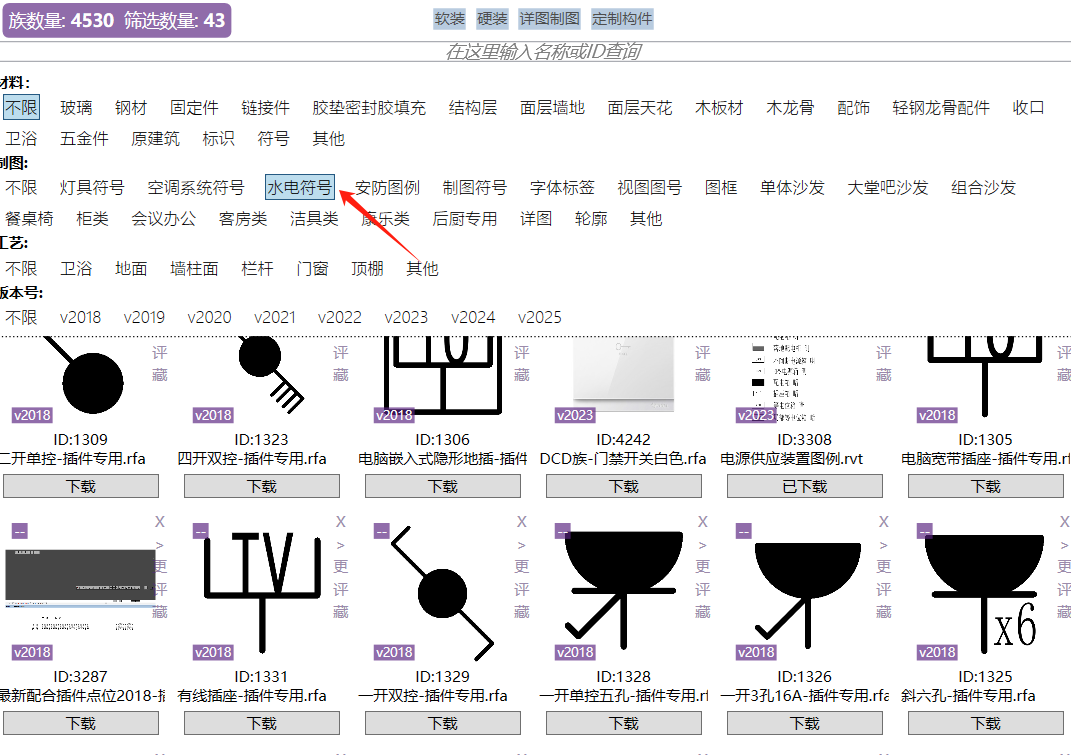
One-click annotation and layout for generated switch point annotations. These switch points require Catfish-specific families to work. Models are available in the family library.
You can also manually box-select to supplement annotations.
# Point Expansion

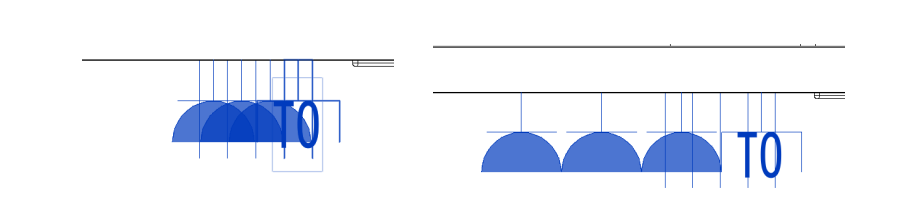
Only expands the annotation symbols of switch points without affecting the placement of MEP point models.
Only applicable to Catfish-specific switches and outlets.
Watch tutorial video on Bilibili → Point Annotation & Expansion (opens new window)
# Height Update

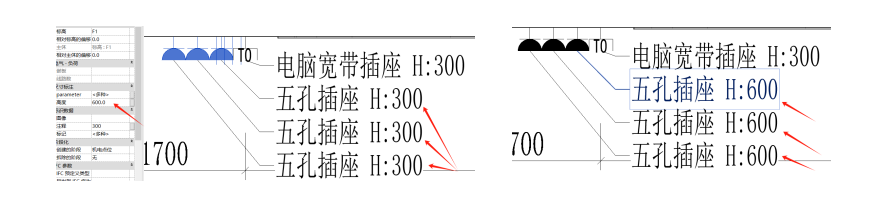
Update height values in annotations for switch points whose heights have been adjusted.
# Position Adjustment

Synchronously move point annotations that need adjustment without affecting the original sort order.
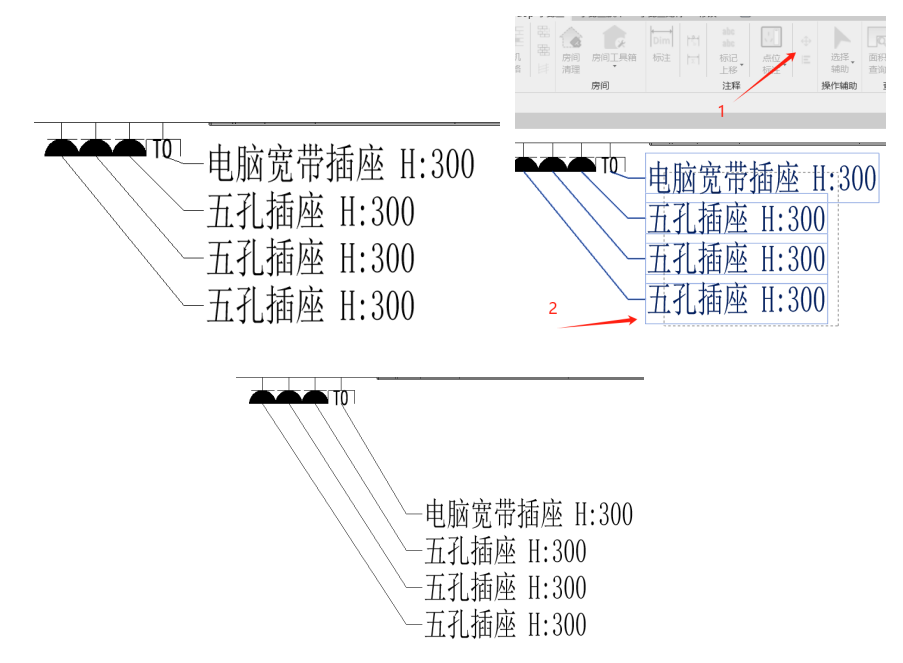
Watch tutorial video on Bilibili → Height Update & Position Adjustment (opens new window)
# One-Click Point Annotation
One-click annotation of all points on both sides of the view.
# Manual Box-Select Placement
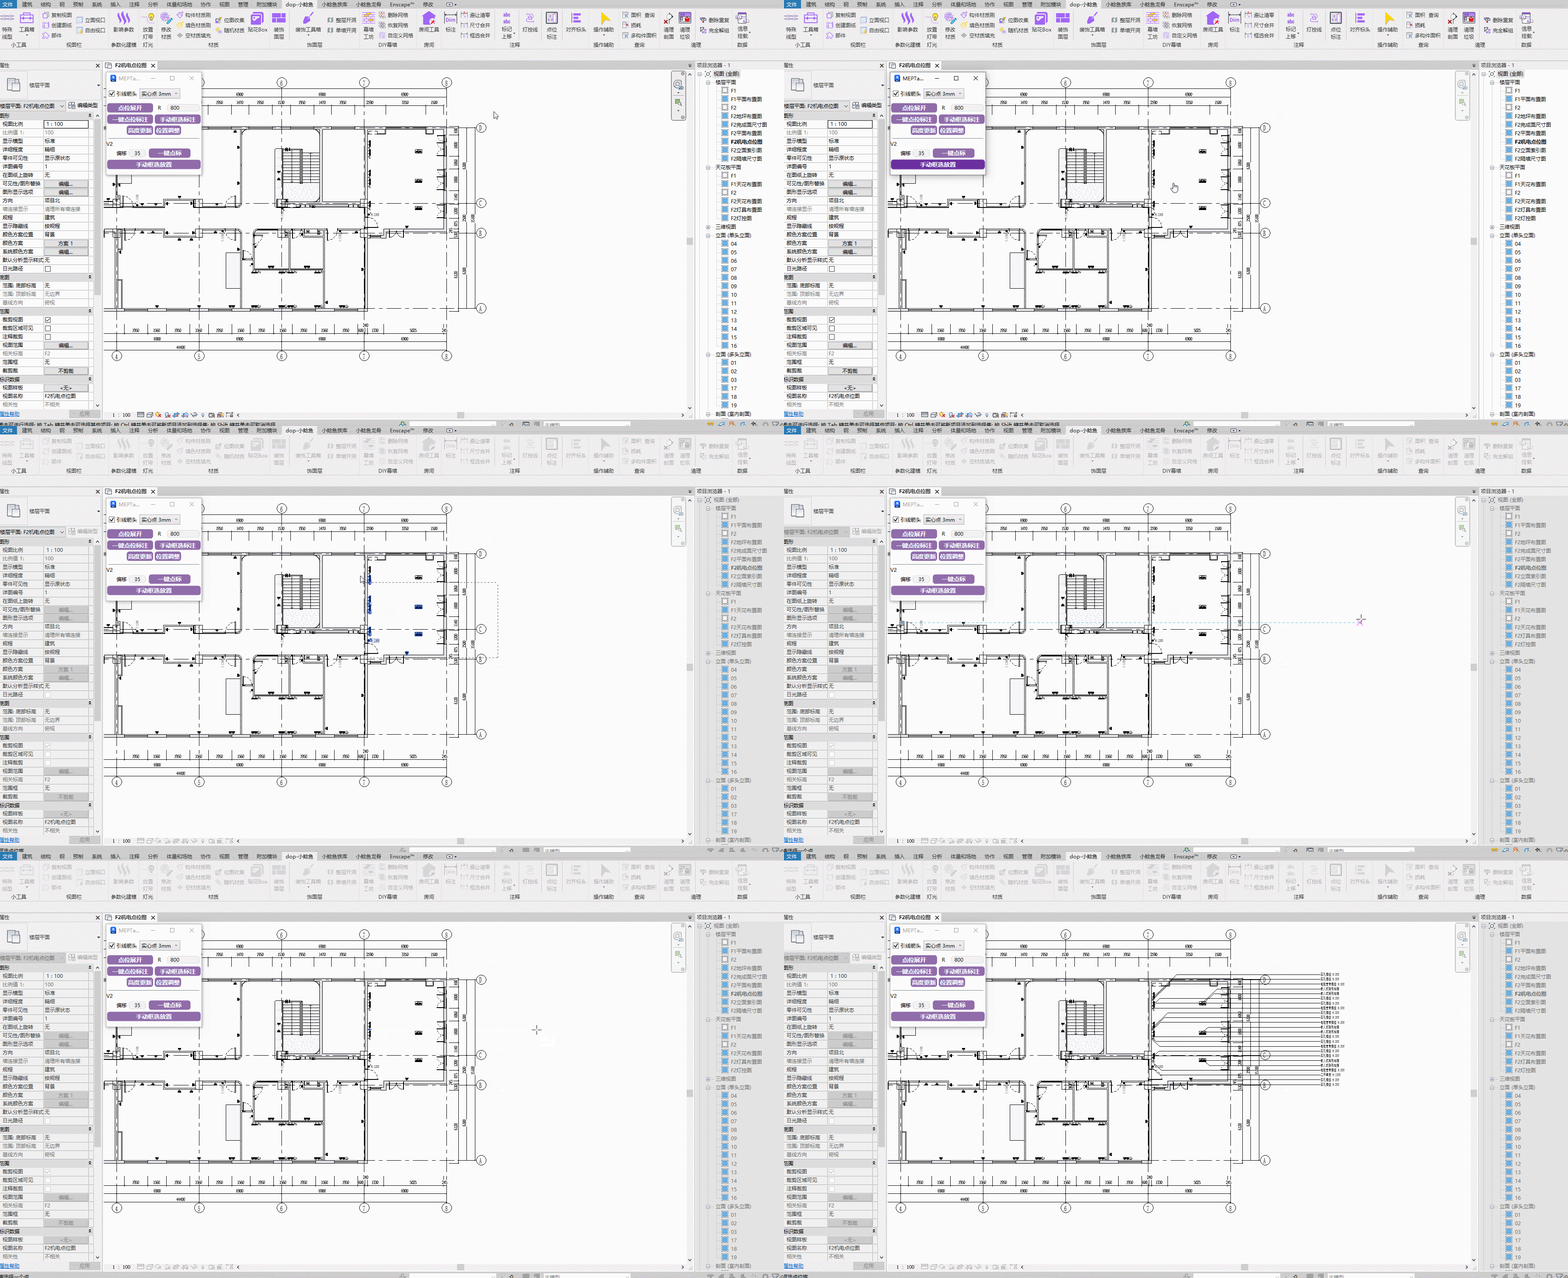
Steps: Box-select points to annotate → Click the placement direction for annotations.
Watch tutorial video on Bilibili → One-Click & Manual Box-Select (opens new window)
# Align Tag Headers

Align annotation tag headers based on drawn lines.
After executing the annotation offset function, first select the target dimension set. When the cursor changes to a crosshair, draw a reference line at the desired position. Press Esc to complete.
Note: The offset function only works when the selected dimensions are in the same direction group.
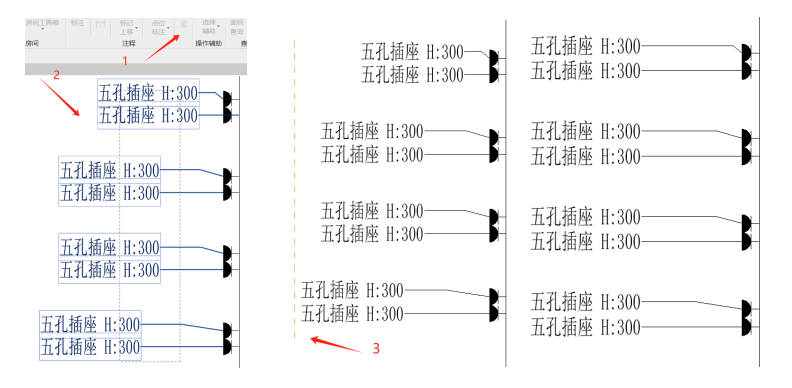
Watch tutorial video on Bilibili → Align Tag Headers (opens new window)
# Fill
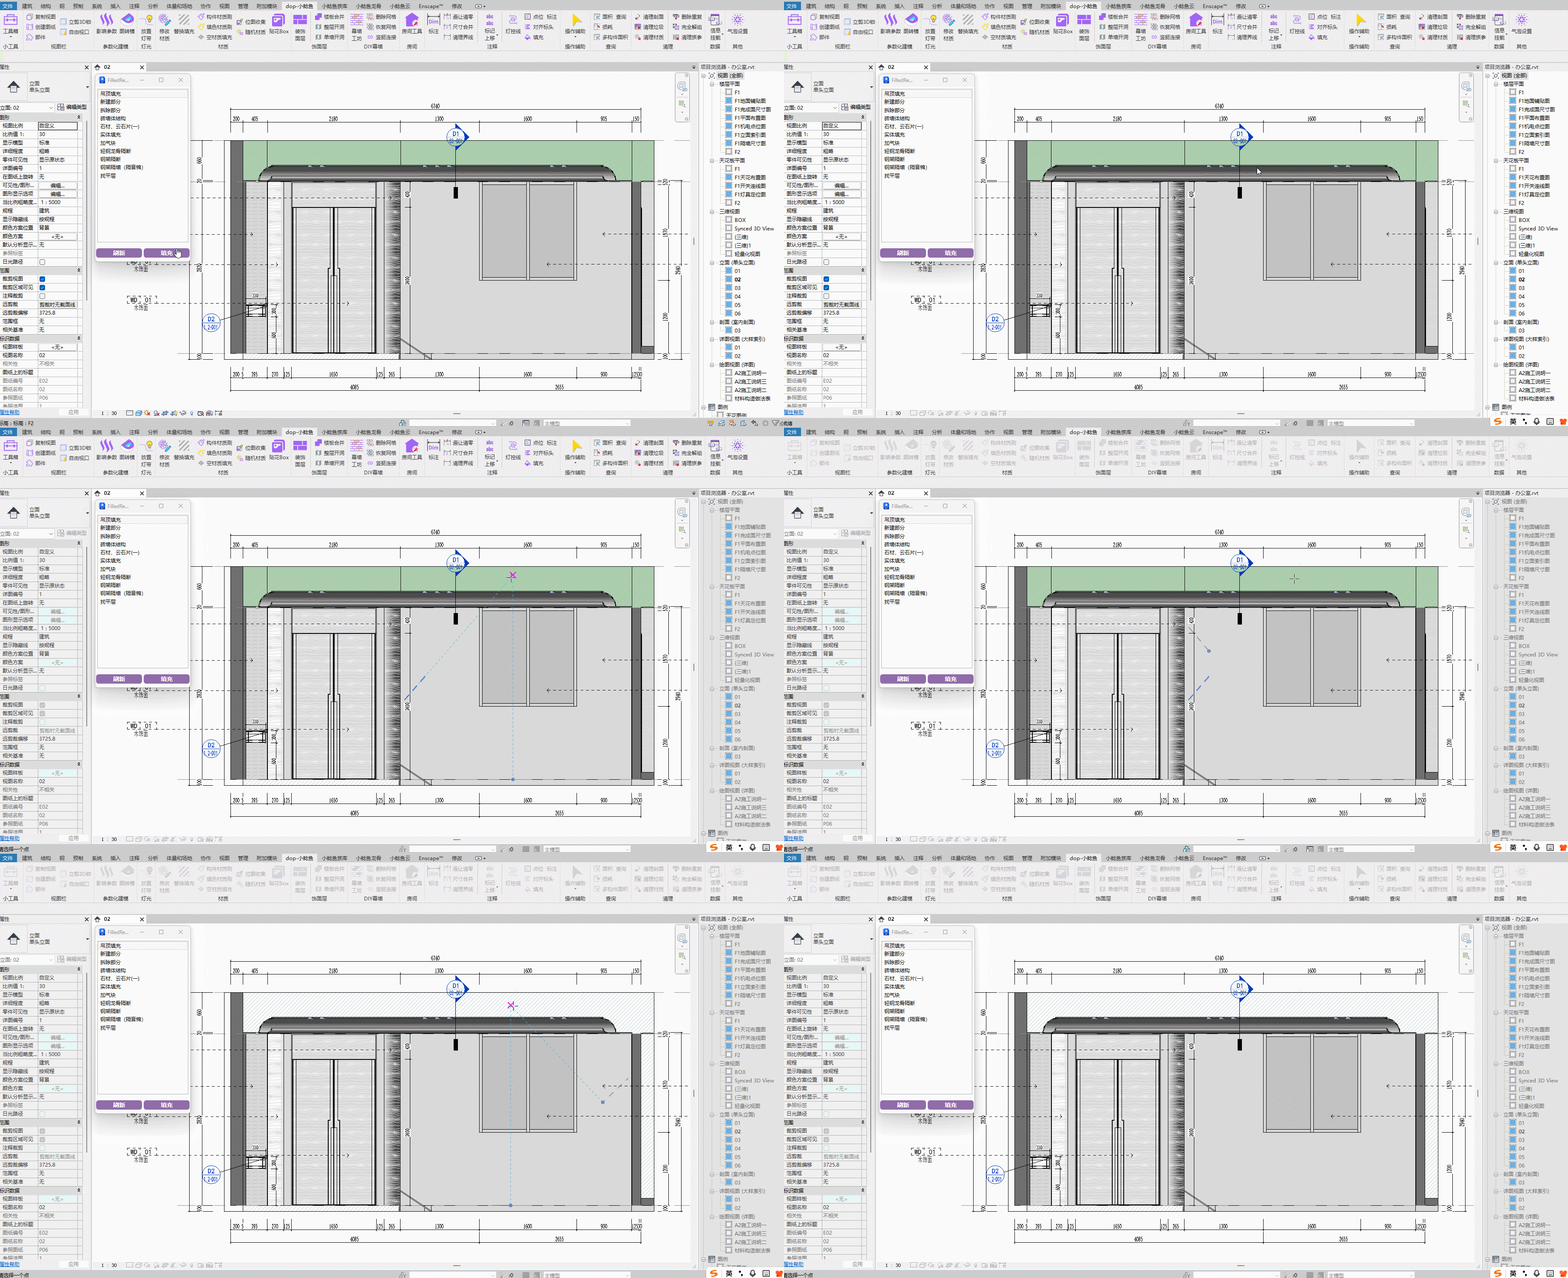
Quickly fill patterns for maintenance areas of section lines in the view.
Watch tutorial video on Bilibili → Fill (opens new window)
# Fill Color
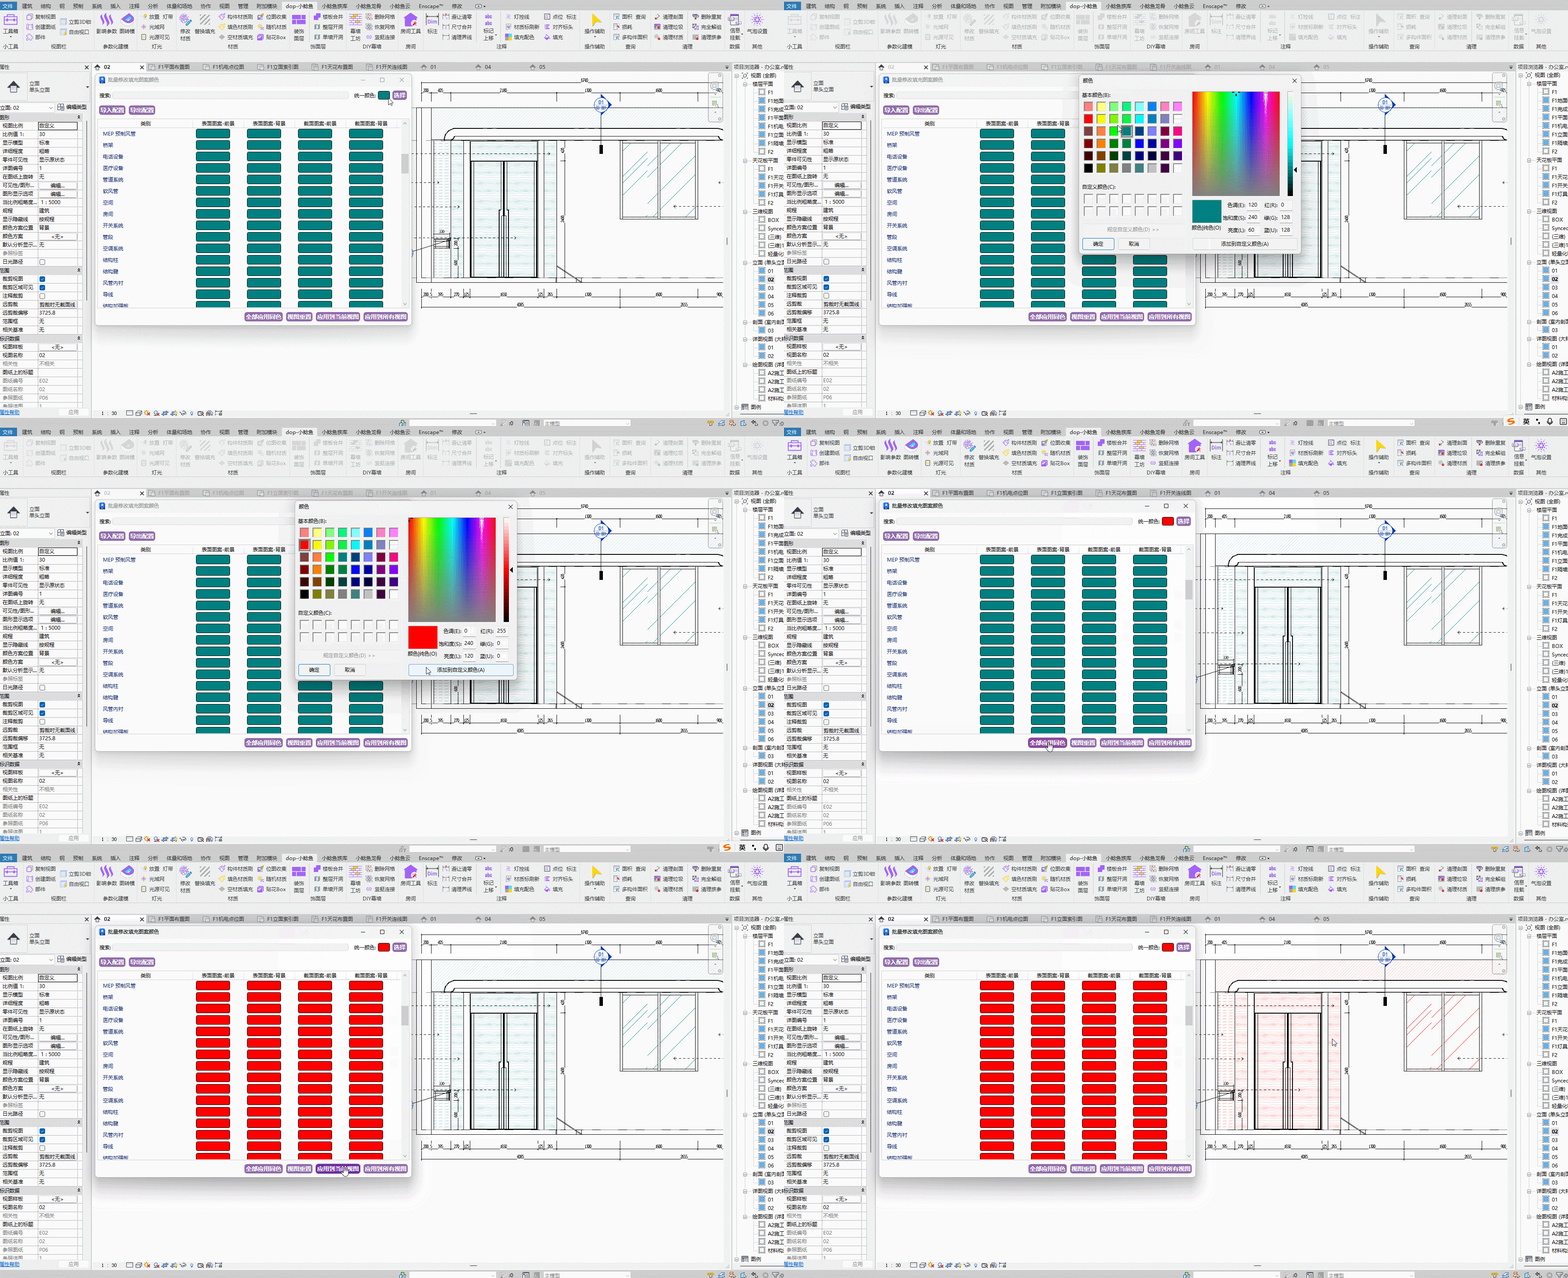
Batch-process the colors of fill patterns in the view.
Watch tutorial video on Bilibili → Fill Color (opens new window)
# Material Tag Refresh
If material annotations in the project show "?" and cannot be refreshed, use this command.